Manual on Accepting/ Rejecting Taxpayer by GST Practitioner
I want to Accept / Reject a Taxpayer’s Engagement request. How do I do that?
Perform the following steps to Accept / Reject a Taxpayer’s engagement request:
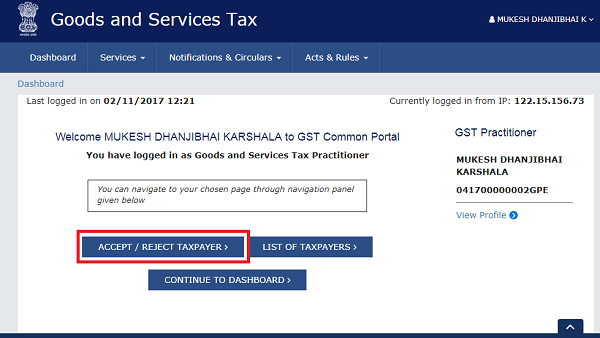
1. As a GST Practitioner, visit the URL: https://www.gst.gov.in, and login to the GST Portal with your user-ID and password.
2. Once the GST Practitioner’s dashboard is displayed, click the ACCEPT/ REJECT TAXPAYER button from the Home screen.
Notes:
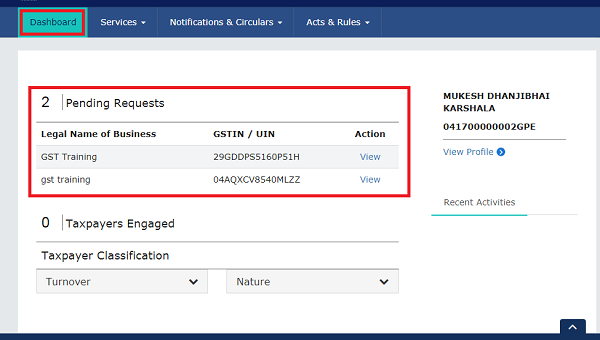
- There are several ways of viewing the Taxpayer’s engagement request. The one shown in above screen is the most direct and simplest approach. You can also use the paths mentioned in below two points:
- Click the Services > User Services > Accept / Reject Taxpayer option.

- Go to the Dashboard screen.
3. Using any of the navigation path, click the ‘View’ link corresponding to the engagement request that you wish to approve or reject.
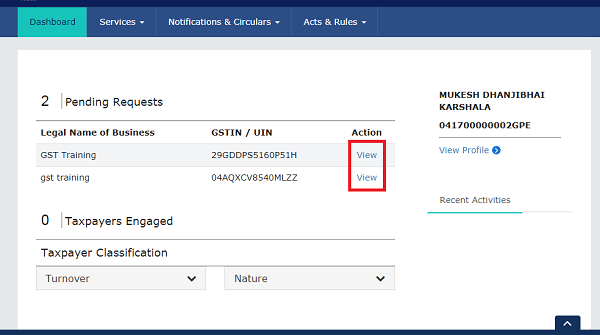
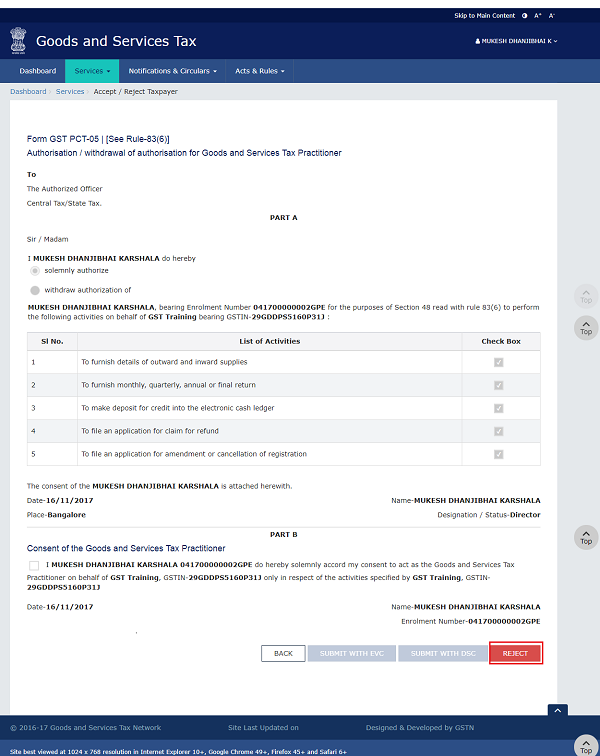
4. On clicking ‘View’, system will open the form of “Authorization / withdrawal of authorization for Goods and Services Tax Practitioner”.
Notes:
- The list of activities show all the check boxes enabled by default and the system does not allow un-checking any of these five options.
- As per the current functionality in GST Portal, a Taxpayer will have to engage the GST Practitioner for all the listed five activities.
- The GST Portal may allow un-checking the activities in future.
APPROVE:
5. Check the Consent box.
6. Click the SUBMIT WITH DSC/ SUBMIT WITH EVC button.

In case of SUBMIT WITH DSC
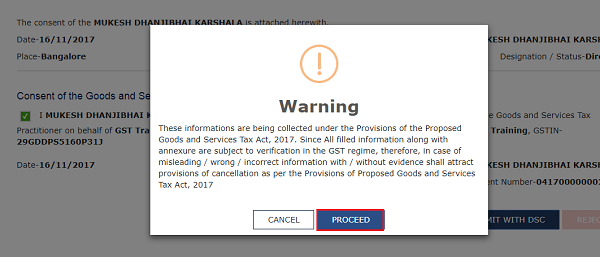
7. Once you click SUBMIT WITH DSC, the system will show a warning message; Click PROCEED.
8. Select the certificate and click the Sign button.
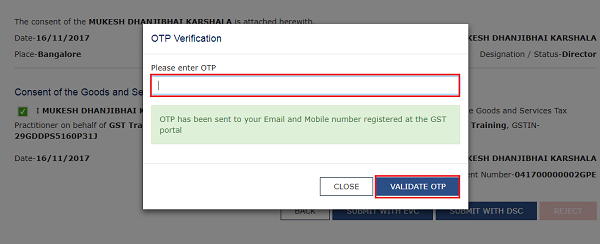
In case of SUBMIT WITH EVC.
7. Enter the OTP and click the VALIDATE OTP button
Notes:
- The system will display a confirmation message.
- An Email will be sent to the GST Practitioner and the Taxpayer.
- The newly engaged Taxpayer will show on the GST Practitioner’s dashboard and the numeric count in front of ‘Taxpayers Engaged’ section on the dashboard will increase by one.
- The Taxpayer will get added to the GST Practitioner’s client list

REJECT:
5. Click the ‘REJECT’ button. (Do not check the Consent box.)
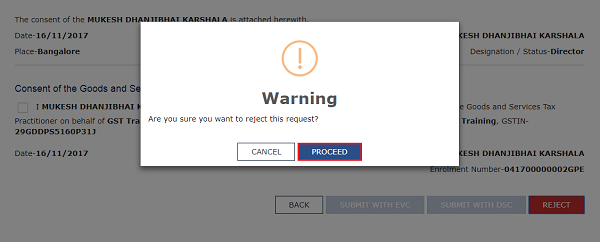
6. The system will show a warning message. Click PROCEED.
Notes:
- The system will display a confirmation message.
- An Email will be sent to the GST Practitioner and the Taxpayer.
- The newly engaged Taxpayer will show on the GST Practitioner’s dashboard
- The Taxpayer will get added to the GST Practitioner’s client list


