Registration as a GST Practitioner (GSTP) on the GST Portal?
1. Access the https://www.gst.gov.in/ URL. The GST Home page is displayed.
2. Click Services > Registration > New Registration option.

Part A:
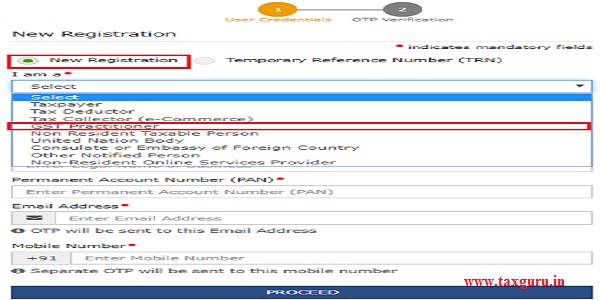
3. The New Registration page is displayed. Select the New Registration option.
4. In the I am a drop down list, select the GST Practitioner as the type of taxpayer to be registered.
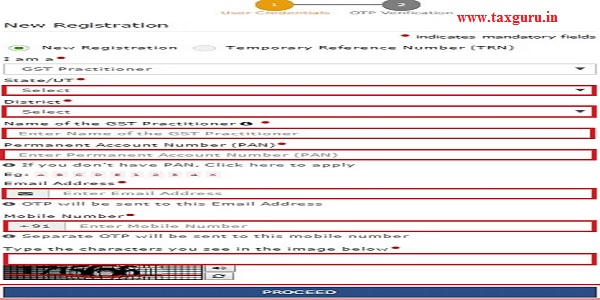
5. In the State/UT and District drop down list, select the state for which registration is required and district.
6. In the Name of the GST Practitioner (As mentioned in PAN) field, enter the legal name as mentioned in the PAN database.
7. In the Permanent Account Number (PAN)field, enter PAN number.
Note:
- In case you don’t have PAN, you can apply for PAN. To do so, click the here link.
- Legal Name of the GST Practitioner and PAN will be validated against the CBDT database.
8. In the Email Address field, enter the email address of the Primary Authorized Signatory.
9. In the Mobile Number field, enter the valid Indian mobile number of the Primary Authorized Signatory.
Note: Different One Time Password (OTP) will be sent on your email address and mobile number you just mentioned for authentication.
10. In the Type the characters you see in the image below field, enter the captcha text.
11. Click the PROCEED button.
Note: On clicking proceed, GST Portal displays all the GSTINs / Provisional ID’s / UINs / GSTP IDs mapped to the same PAN across India. Click the PROCEED button.

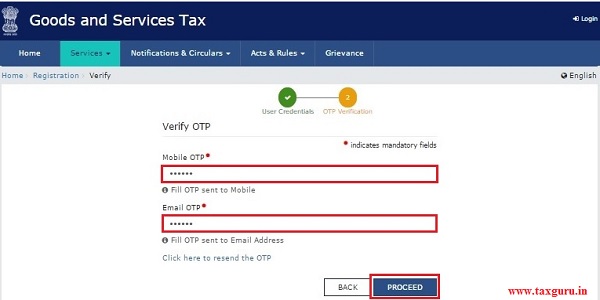
After successful validation, you will be directed to the OTP Verification page.
12. In the Mobile OTPfield, enter the OTP you received on your mobile number entered in PART-A of the form. OTP is valid only for 10 minutes.
13. In the Email OTPfield, enter the OTP you received on your email address entered in PART-A of the form. OTP is valid only for 10 minutes.
Note: OTP sent to mobile number and email address are separate. In case OTP is invalid, try again by clicking the Click here to resend the OTP link. You will receive the OTP on your registered mobile number or email ID again. Enter both the newly received OTPs again.
14. Click the PROCEED button.
15. The system generated 15-digit Temporary Reference Number (TRN) is displayed.
Note: You will receive the TRN acknowledgment information on your e-mail address as well as on your mobile number. Note that below the TRN, expiry date of TRN will also be mentioned. Click PROCEED button.
Alternatively, you can also click Services > Registration > New Registration option and select the Temporary Reference Number (TRN) radio button to login using the TRN.

PART-B:
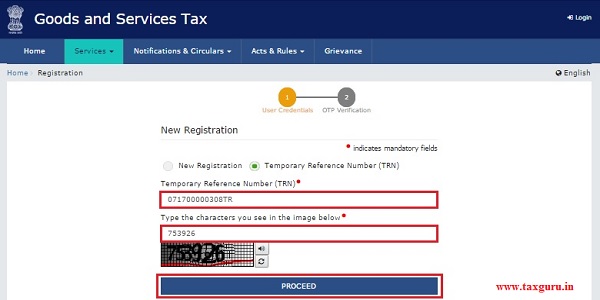
16. In the Temporary Reference Number (TRN)field, enter the TRN generated.
17. In the Type the characters you see in the image below field, enter the captcha text.
18. Click the PROCEED button.
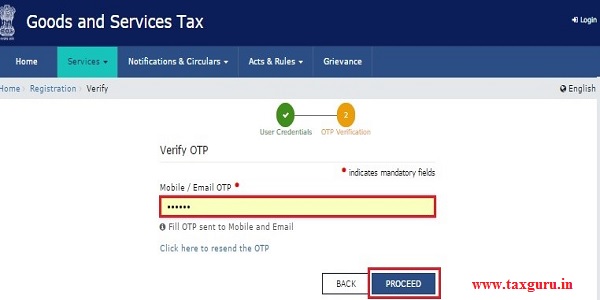
19. The Verify OTP page is displayed. You will receive same Mobile OTP and Email OTP. These OTPs are different from the OTPs you received in previous step. In the Mobile / Email OTPfield, enter the OTP you received on your mobile number and email address. OTP is valid only for 10 minutes.
Note:
- OTP sent to mobile number and email address are same.
- In case OTP is invalid, try again by clicking the Click here to resend the OTP link. You will receive the OTP on your registered mobile number or email ID again. Enter the newly received OTP again.
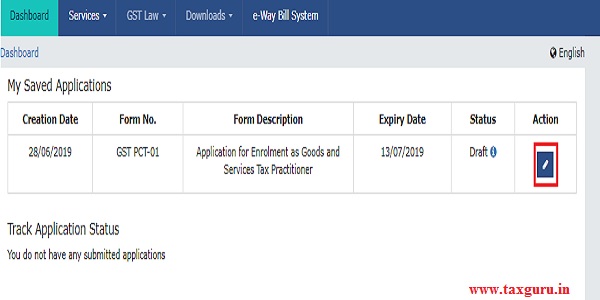
20. The My Saved Application page is displayed. Under the Action column, click the Edit icon (icon in blue square with white pen).
Note:
- Notice the expiry date shown below in the screenshot. If the applicant doesn’t submit the application within 15 days, TRN and the entire information filled against that TRN will be purged after 15 days.
- The status of the registration application is ‘Draft’ unless the application is submitted. Once the application is submitted, the status is changed to ‘Pending for Validation’.
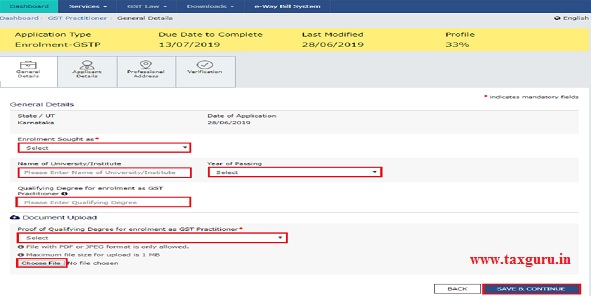
PART-B of the form has four sections that must be filled sequentially. The first section is General Details.
General Details:
a) Under enrolment sought as, please select an option from the drop-down given.
b) Enter the name of your University/Institute where you received your academic credentials.
c) Select your year of passing from the dropdown menu.
d) Enter the name of the Qualifying Degree for enrolment as a GST Practitioner
e) Under Proof of Qualifying Degree for enrolment as a GST Practitioner, select the document type from the dropdown given.
f) Upload the document in PDF or JPEG format only (file size must be less than 1 MB.
g) Once you have filled in all the sections, click on SAVE AND CONTINUEto move to the next section.
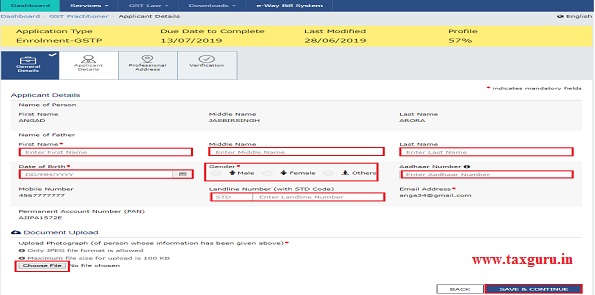
Applicant Details:
a) Select your date of birth.
b) Enter your first, middle, and last name (first name is mandatory).
c) Select your gender.
d) Enter all the details and upload your photograph.
e) Upload your photograph in JPEG format (file size should not exceed 100 KB)
f) Once you have entered all the details and uploaded the photograph, click SAVE AND CONTINUEto move on to the next section.
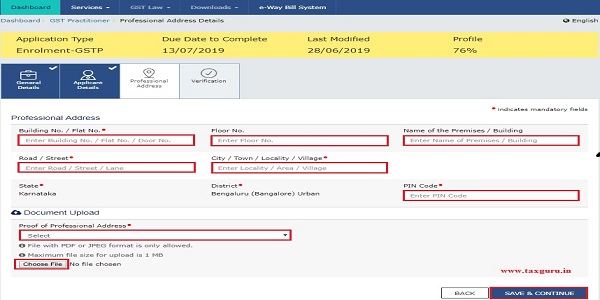
Professional Address:
a) Enter the address with the correct PIN Code. State and District will be auto populated from PART-A of the form.
b) Select the appropriate proof of professional address from the dropdown menu.
c) Upload the selected proof of professional address in JPEG or PDF format with a file size not exceeding 1 MB.
d) Once all the details are entered and the document is successfully uploaded, click SAVE AND CONTINUEto go to the final section.
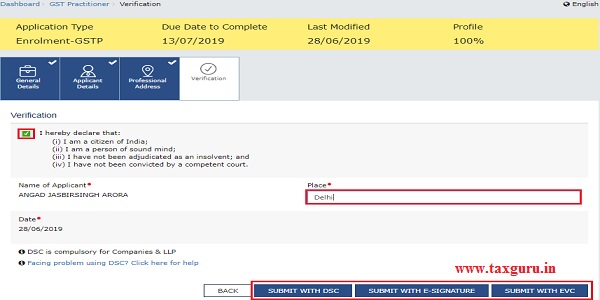
Verification page:
a) Check the check-box with the verification statement.
b) Enter the place.
c) You may now choose to submit the form using DSC, E-Signature or EVC. For E-Signature, you must update your Aadhaar number in the Applicant Details section)
In Case of DSC:
d) Click the SUBMIT WITH DSC
Note: In case, your DSC is not registered, you will need to register DSC.
Note:
- Make sure your DSC dongle is inserted in your laptop/ desktop.
- Make sure emSigner (from eMudra) is running on your laptop/ desktop with administrator permissions.
To check if the emSigner is running on your laptop/ desktop, perform the following steps:
- 1. Click the item tray.
- Double click the emSignericon.
- Click theHide Service buttonto minimize the dialog box.
- Select the certificate and click the SIGNbutton.
- Enter the PIN (dongle password) for the attached DSC.
Note:
To view the details of your DSC, click the View Certificate button.
In Case of E-Signature:
d) Click the SUBMIT WITH E-SIGNATURE
e) In the Please select Service Provideroption, select the appropriate Service Provider.
Note: C-DAC and NSDL are e-sign Service Providers (Both are free of cost).
f) Select the checkbox for declaration.
Note: OTP will be sent to your e-mail address and mobile phone number registered with Aadhaar.
g) Click the CONTINUE 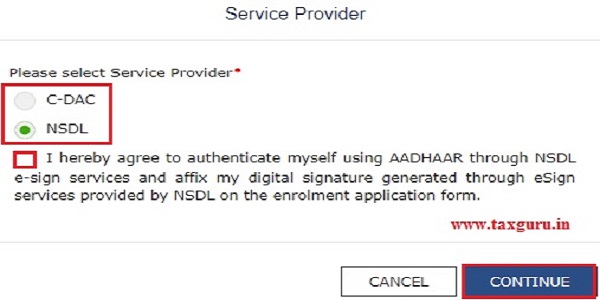
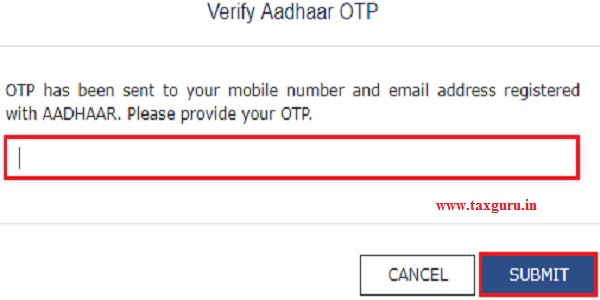
h) Verify Aadhaar OTPscreen is displayed. Enter the OTP received on your e-mail address and mobile phone number registered with Aadhaar. Click theSUBMIT
In Case of EVC:
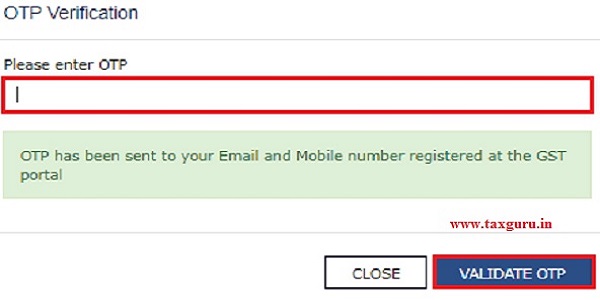
d) Click the SUBMIT WITH EVC
e) Enter the OTP sent to email and mobile number of the Authorized Signatory registered at the GST Portal and click the VALIDATE OTP
The success message is displayed. You will receive the acknowledgement in next 15 minutes on your registered e-mail address and mobile phone number. Application Reference Number (ARN) receipt is sent on your e-mail address and mobile phone number. After submission, you cannot make any changes to your application.

****
Disclaimer: The contents of this article are for information purposes only and does not constitute an advice or a legal opinion and are personal views of the author. It is based upon relevant law and/or facts available at that point of time and prepared with due accuracy & reliability. Readers are requested to check and refer relevant provisions of statute, latest judicial pronouncements, circulars, clarifications etc before acting on the basis of the above write up. The possibility of other views on the subject matter cannot be ruled out. By the use of the said information, you agree that Author / TaxGuru is not responsible or liable in any manner for the authenticity, accuracy, completeness, errors or any kind of omissions in this piece of information for any action taken thereof. This is not any kind of advertisement or solicitation of work by a professional.


