Goods & Services Tax- Self Service Portal- User Guide
About
Tax payers/GSPs to be enabled with an access to a Self-Service portal, wherein they do not need to wait in a queue for their call to be answered by a Service Desk associate, or to write emails to report their concern, and get the ticket number shared with them as a notification, after interaction. Instead, they would be able to raise tickets directly from Self-Service portal.
This GSTN user guide manual provides the information for those users who want to report the issue or check the status regarding Goods and Services Tax (GST). Suitable link will be provided on GST website.
Quick Guide
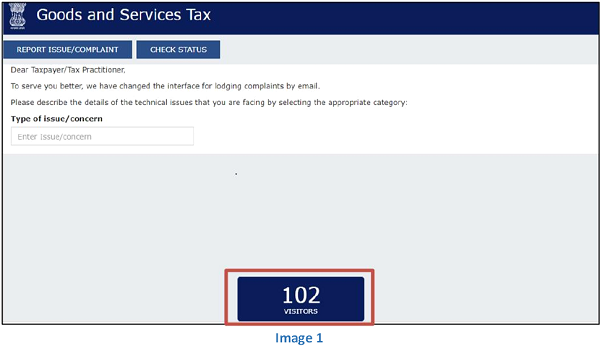
Visitors
The count of the total visitors who have visited the portal would be shown based on the uniqueness of their IP addresses.
 Report Issue/Concern
(1) User needs to enter the type of issue or concern which he is facing now.
(2) When the user enters the issue then relevant keywords match will be shown by which he will easily select the exact issue.
 (3) No search result found – In case the keywords of the entered issue is not found and does not exist in the database, then the FAQ’s would not be automatically populated. An option for selecting the category and sub-category of issue would be displayed.

FAQ’s
(1) As soon as the user selects any one of them then the relevant FAQ’s (Frequently Asked Questions) will be displayed.
(2) The FAQ’s section will expand automatically displaying the relevant FAQ’s based on the user’s search.

(4) Then list of FAQ’s will be shown.
Like and Dislike option for FAQ’s
> A functionality would be provided where the user can like or dislike the FAQ based on their experience.
> If user issue is resolved by the FAQ’s provided then there will be an option to share the feedback by clicking the ![]() icon.
icon.
> If user issue could not be addressed by the FAQ provided then user can select the ![]() icon.
icon.
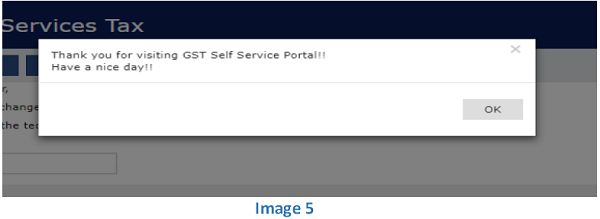
> If the FAQ’s provided were helpful to the user then they would click on ‘YES’ button. When the user clicks on ‘YES’ button then the message will be displayed at user’s screen.
Category and sub-category
When user selects “No, I want to lodge My Complaint” then the portal page would automatically expand. User have to enter the category and sub category and fill the ticket details.
(1) Category and sub-category would be shown at the top of the portal.
(2) Category and sub-category would be mapped to the keywords entered by the user.
(3) User needs to enter the category from the drop down menu.
(4) User needs to enter the sub-category from the drop down menu.

> All sub-categories are the extension of category which the user has selected.
> The category and sub-category option would be displayed alongside the Type of issue textbox. The category and sub-category would be automatically selected based on the entered keywords. The user has an option to manually select the preferred category and sub-category of the issue they are facing.
 (5) When the user change the category and sub category then click on “+” icon.
> The FAQ’s section will expand displaying the relevant FAQ’s based on the user’s search.
> If user problem is resolved by the FAQ’s provided based on entering the issue then there will be an option to share the feedback by clicking the ![]() icon and at last click on ‘YES’.
icon and at last click on ‘YES’.
> If the user’s problem cannot be resolved by the FAO’s then user will be clicking on “No, I want to lodge My Complaint”.
Ticket Details
(1) Ticket details will automatically expand when user clicks on “No I want to lodge my complaint”.
(2) User have to enter the following fields and all are mandatory:-
> GSTN/ARN/TRN: – User have to enter either the GSTN, ARN or TRN number.
> PAN: – User have to enter the Personal Account Number.
> First name: – User have to write the first name.
> Last name: – User have to write the last name.
> Mobile number: – User have to enter the contact number.
> E-mail Address: – User have to enter the valid mail-id.
> Problem Description: – User have to describe their problem which they are facing now.
 Validation on ticket details fields
(1) If the user fills the wrong information or not fills the any field which is mandatory to fill then message will pop up in red color like “Not a valid PAN number” or “This field is required”.
(2) GSTN/ARN/TRN: – GSTN number consists of 15 digit number.
(3) PAN: – PAN number consists of 10 digit alphanumeric.
(4) First name: – User have to write the first name.
(5) Last name: – User have to write the last name.
(6) Mobile number: – Mobile number consists of 10 digit.
(7) E-mail Address: – User have to enter the valid mail-id.
(8) Problem Description: – User have to describe their problem which they are facing now.

Attachments
The attachment section will expand automatically as shown below:-

(1) If the user wants to attach the files then click on “choose file”.
(2) User can browse the file and insert the file.
(3) If the user wants to add more attachments then click on ‘Add More’ button.
(4) User can add maximum 10 attachments; however, all combined attachments should not be exceed the size limit i.e. 5 MB.
(5) Only PNG, JPG and PDF files are allowed as attachment.
Captcha Code
> An automatically generated unique code would be displayed to the user for security This code would be used to validate the authenticity of the user.
> User have to enter the code which is shown above.
> User needs to enter the valid captcha. If user fills the invalid captcha then message will pop-up‘Invalid Captcha’, then you have to fill again.
> If user can’t read the captcha then user have to clicks on “Click here to refresh the image”. Then new captcha will be shown on the screen.

Submit
> When user will click on ‘submit’ button then message will pop up and ask a question that “Do you really want to create the ticket?”
> If the user clicks on “YES” button then Docket number will be created.

> Once the user credentials are accepted, on the portal page a pop-up will be displayed to the user with their current ticket status. Ticket status on E-mail would be sent to the user.
> If the user wants to save the ticket number as “pdf” then click on 
> If user wants to Print out the docket number then click on 
 Modules are Expandable/Collapsable
All the three fields i.e. FAQ’s, Ticket Details, Attachments are expandable, when the user clicks on “+” icon then all the fields will be shown. If the user clicks on “-“icon then all the fields would be collapsed.

Check STATUS
Firstly, Tax payer/GSP will open the portal.
User will select Check Ticket status option, the system should open basic details form they need to enter Docket no
(1) User have to fill the Personal details which include :-
> Ticket Reference no. : User needs to enter the valid reference number.
> Code: User needs to enter the valid captcha code visible.
(2) If the user can’t read the captcha then user will have to click on “Click here to refresh image”.
(3) After filling information, user will have to click on ‘SEARCH’ button.

(4) If user fills the invalid complaint no. or captcha then message will pop-up ‘Invalid Complaint no or Captcha’, then you have to fill again.

(5) Once the user’s credentials are accepted, on the portal page a pop-up will be displayed to the user “Thank You! The details related to your ticket has been sent to your registered email address”. Ticket status on E-mail would be sent to the user.


