Manual on Transition Form GST TRAN – 2
How can I file transition Form GST TRAN – 2?
To file transition Form GST TRAN – 2, perform the following steps:
1. Login and Navigate to Transitions Forms > TRAN – 2 page
2. Enter details in various tiles
- Online Mode
- Offline Mode
3. Download TRAN-2 details
4. Submit TRAN – 2 to freeze data
5. File TRAN – 2 with DSC or EVC
1. Login and Navigate to Transitions Forms > TRAN – 2 page
1. Access the www.gst.gov.in URL. The GST Home page is displayed.
2. Login to the GST Portal with valid credentials.
3. Click the Services > Returns > Transition Forms command.
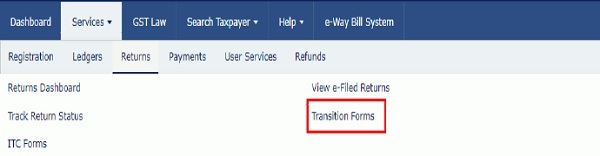
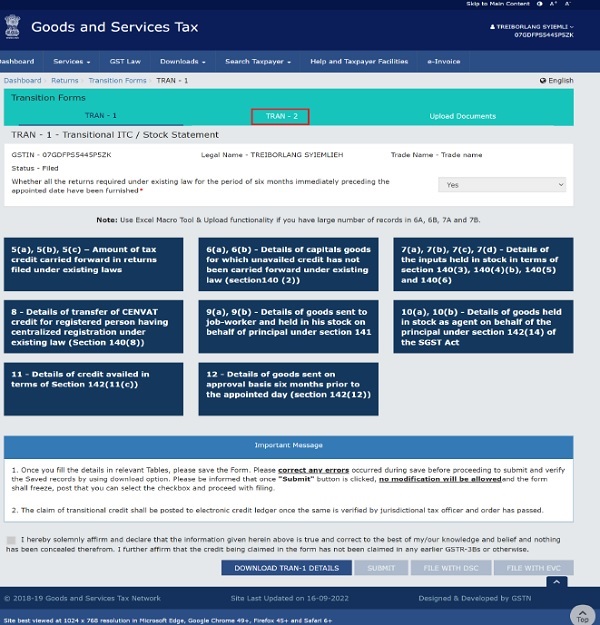
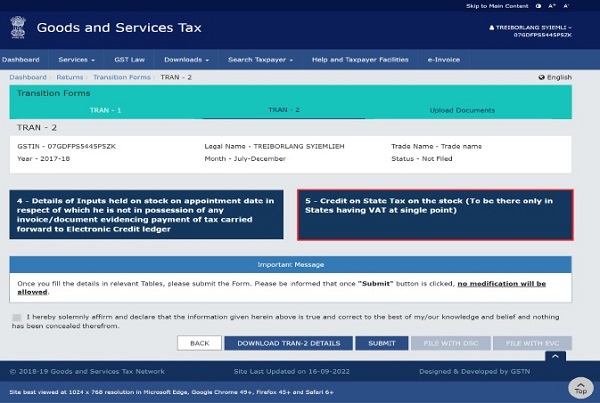
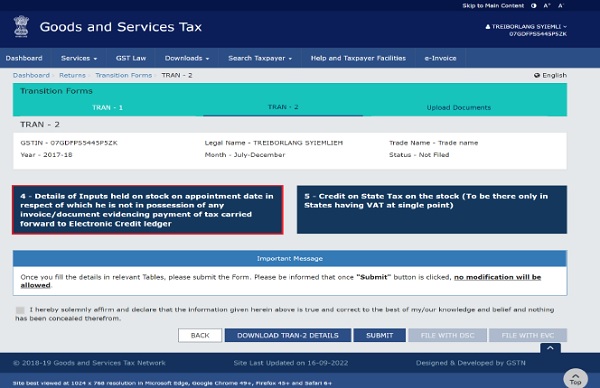
4. The Transition Forms page is displayed. The tabs of transition forms TRAN – 1/ TRAN – 2/ Upload documents are visible in the top band. Tiles of Form TRAN – 1 will be visible by default. Click the TRAN – 2 tab.
2. Enter details in various tiles
There are a number of tiles representing different Tables to enter relevant details. You can enter details in these tiles through online/ offline mode.
Online Mode
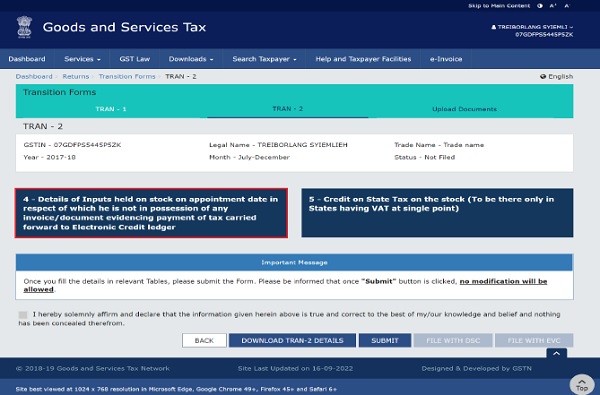
3 – Details of Inputs held on stock on appointment date in respect of which he is not in possession of any invoice/document evidencing payment of tax carried forward to Electronic Credit ledger
Note: In case you have not declared anything in part 7B of table 7(a) of TRAN-1, you will not be permitted to fill any details in Table 4 of TRAN-2.
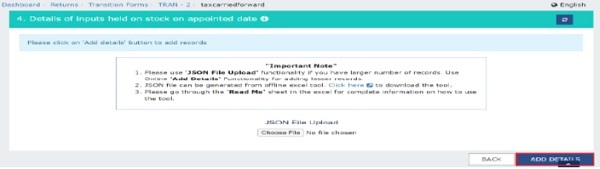
1. Click the 4 – Details of Inputs held on stock on appointment date in respect of which he is not in possession of any invoice/document evidencing payment of tax carried forward to Electronic Credit ledger tile.
2. Click the ADD DETAILS button to add a new invoice.
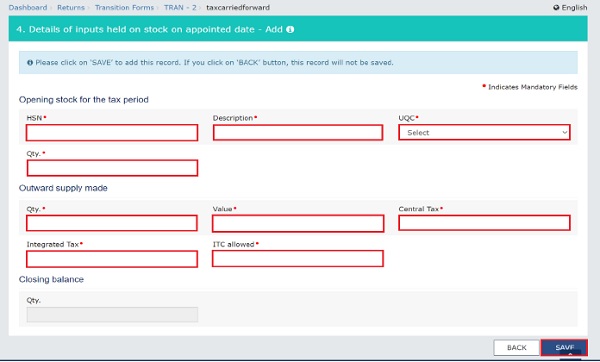
3. In the HSN field, enter the HSN code as per applicable provision of reporting HSN code same as what you entered in the TRAN 1 form in table 7(a) with option “No.” for the field “invoice evidencing payment of duty”.
4. In the Description field, enter the description. (Either HSN or Description should be mandatorily entered)
5. In the UQC field, select UQC.
6. In the Qty. field, enter the quantity of the opening stock for the tax period declared earlier in Table 7(a) of TRAN 1.
7. In the Qty. field, enter the quantity for the outward supply made in the tax period.
8. In the Value field, enter the total value of the outward supply made in the tax period.
9. In the Central Tax field, enter the central tax paid on the outward supply of the goods made in the tax period.
10. In the Integrated Tax field, enter the integrated tax paid on the outward supply of the goods made in the tax period.
11. In the ITC Allowed field, enter the ITC allowed on the central tax and integrated tax paid on the outward supply depending on the tax rate of the sold/supplied goods.
12. Click the ADD button.
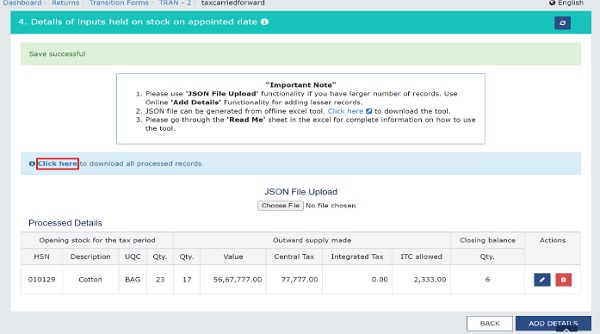
You will be directed to the previous page and invoice is added.
NOTE 1: Click the pen icon (..) under the Actions column to edit.
NOTE 2: Click the delete icon (..) to erase the inputs given in various headers.
![]()
Note:
- You are required to file one consolidated TRAN-2 for the entire period.
Download Processed Records
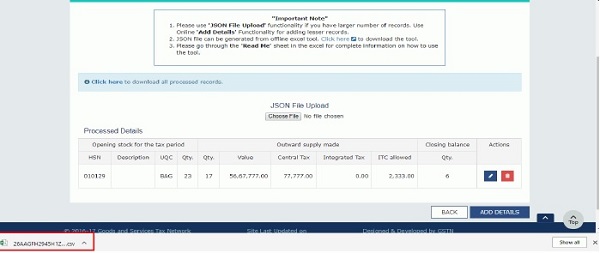
Once files are updated, you can download the processed records (Both Online and Offline) in CSV format to verify the recorded added during upload. Click the Click here link
Processed records in CSV format are downloaded to verify the recorded added during upload.
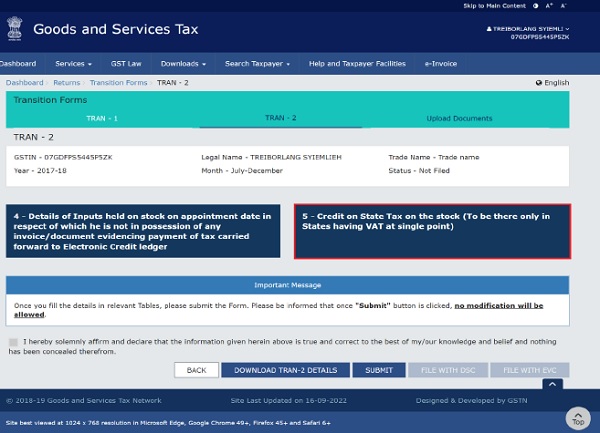
4 – Credit on State Tax on the stock (To be there only in States having VAT at single point)
Note: In case you have not declared anything in table 7(d) of TRAN-1, you cannot fill any details in table 5 of TRAN-2.
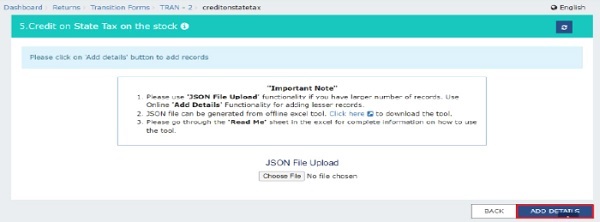
1. Click the 5 – Credit on State Tax on the stock (To be there only in States having VAT at single point) tile.
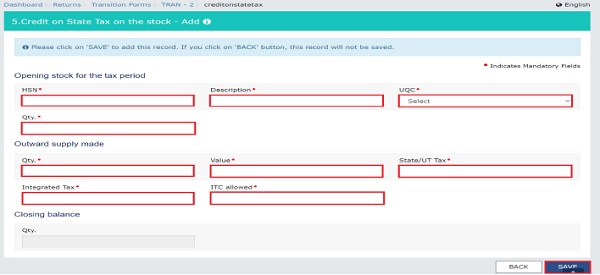
2. Click the ADD DETAILS button to add a new invoice.
3. In the HSN field, enter the HSN code as per applicable provision of reporting HSN code.
4. In the Description field, enter the description. (Either HSN or Description should be mandatorily entered) as declared in the table 7(d) of TRAN 1.
5. In the UQC field, select UQC.
6. In the Qty. field, enter the quantity of the opening stock for the tax period as declared in the table 7(d) of TRAN 1.
7. In the Value field, enter the quantity for the outward supply made in the tax period.
8. In the Value field, enter the total value of the outward supply made in the tax period.
9. In the State/UT Tax field, enter the State/ UT tax paid on the outward supply made in the tax period.
10. In the Integrated Tax field, enter the integrated tax paid on the outward supply made in the tax period.
11. In the ITC Allowed field, enter the ITC allowed as a percentage of the State/ UT/ Integrated tax paid depending on tax rate on the outward supply made in the tax period.
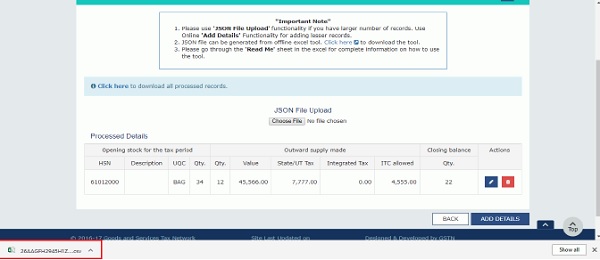
12. Click the ADD button
You will be directed to the previous page and invoice is added.
NOTE 1: Click the pen icon (…) under the Actions column to edit.
NOTE 2: Click the delete icon (…) to erase the inputs given in various headers.
![]()
Download Processed Records
Once files are updated, you can download the processed records (Both Online and Offline) in CSV format to verify the recorded added during upload. Click the Click here link.

Processed records in CSV format are downloaded to verify the recorded added during upload.
Offline Mode
5 – Details of Inputs held on stock on appointment date in respect of which he is not in possession of any invoice/document evidencing payment of tax carried forward to Electronic Credit ledger
Note: In case you have not declared anything in part 7B of table 7(a) of TRAN-1, you will not be permitted to fill any details in Table 4 of TRAN-2.
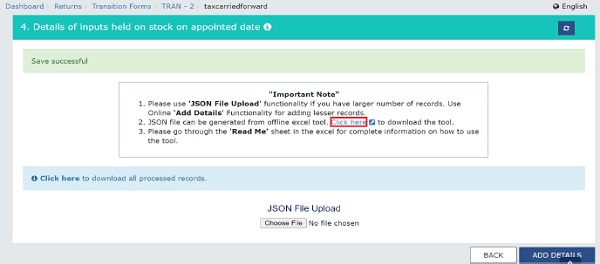
1. Click the Table4 – Details of Inputs held on stock on appointment date in respect of which he is not in possession of any invoice/document evidencing payment of tax carried forward to Electronic Credit ledger tile.
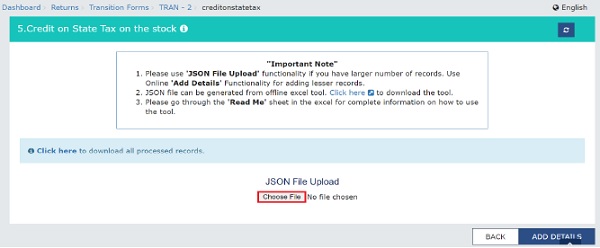
Note: You can use ‘JSON File Upload’ functionality if you have larger number of records. Use Online ‘Add Details’ functionality for adding lesser records.
Download the sample JSON file:
1. Click the Click here link to download the same JSON file
2. Click the PROCEED button.

3. Once downloaded, open the JSON file, fill the details and save it.
4. Click the Choose File button.
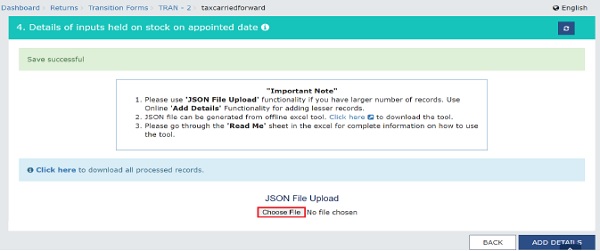
Select the JSON file and click the Open button.
A success message is displayed that the JSON file is saved successfully.
6 – Credit on State Tax on the stock (To be there only in States having VAT at single point)
Note: In case you have not declared anything in table 7(d) of TRAN-1, you cannot fill any details in table 5 of TRAN-2.
1. Click the 5 – Credit on State Tax on the stock (To be there only in States having VAT at single point) tile.
Note: You can use ‘JSON File Upload’ functionality if you have larger number of records. Use Online ‘Add Details’ functionality for adding lesser records.
Download the sample JSON file:
1. Click the Click here link to download the same JSON file.
2. Click the PROCEED button.
3. Once downloaded, open the JSON file, fill the details and save it.
4. Click the Choose File button.
5. Select the JSON file and click the Open button.
A success message is displayed that the JSON file is saved successfully.
7. Download TRAN-2 details
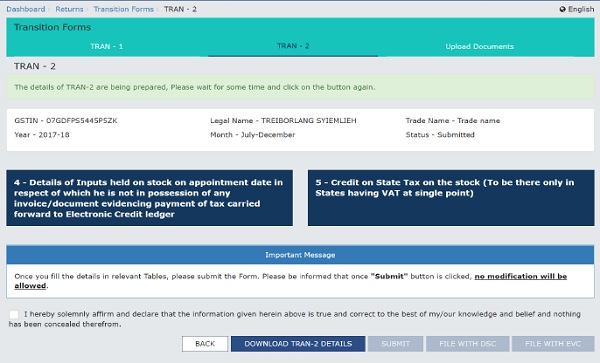
Click DOWNLOAD TRAN-2 DETAILS button to download the saved details in TRAN-2 in Excel file.
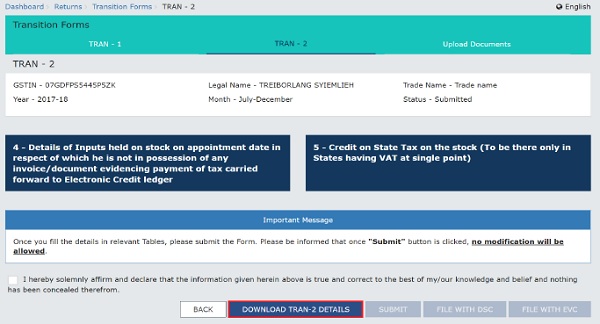
On click of DOWNLOAD TRAN-2 DETAILS button, the acknowledgement message will be displayed.
After few minutes, click on DOWNLOAD TRAN-2 DETAILS, a download link will be provided just below the button DOWNLOAD TRAN-2 DETAILS. Click the Click here to download Excel – File 1 to download the saved details in TRAN-2 in Excel file.
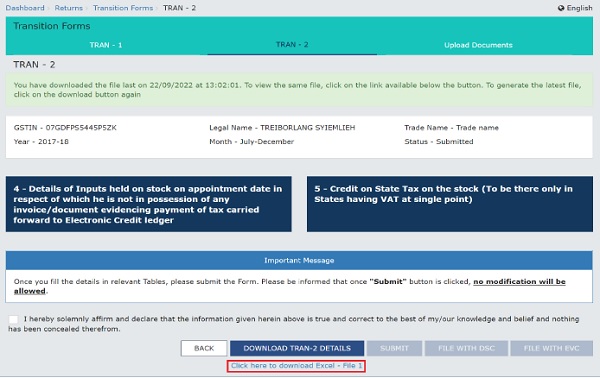
You can download the details of saved TRAN-2 details in excel file. Please verify the details saved in TRAN-2 form and as made available in the excel file.
Once you are satisfied that the details saved are correct, please proceed with SUBMIT TRAN-2 to freeze data.
In case, you want to Add/edit/delete any details already provided, please do it before clicking on SUBMIT button.
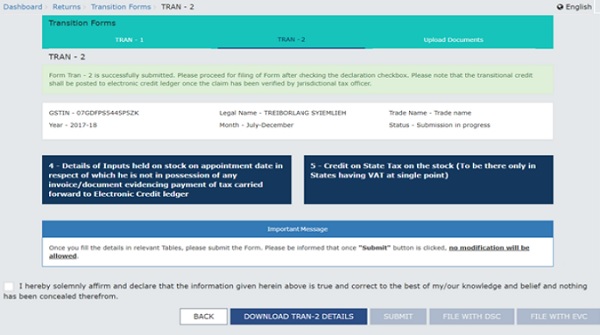
8. Submit TRAN – 2 to freeze data
1. Click the SUBMIT button to freeze the TRAN – 2.
Please note that after submitting, no modification is possible. Hence ensure that details are filled correctly before clicking on Submit button.

2. Click the YES button to submit the TRAN – 2.

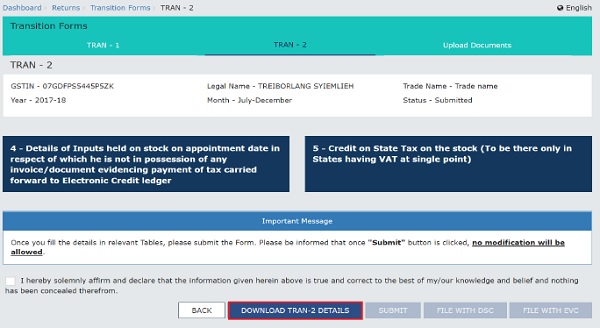
3. A success message is displayed at the top of the page. Once you submit the data, data is frozen, and you cannot change any fields.
4. Click the DOWNLOAD TRAN-2 Details button again, to download the submitted TRAN-2 details in Excel format.
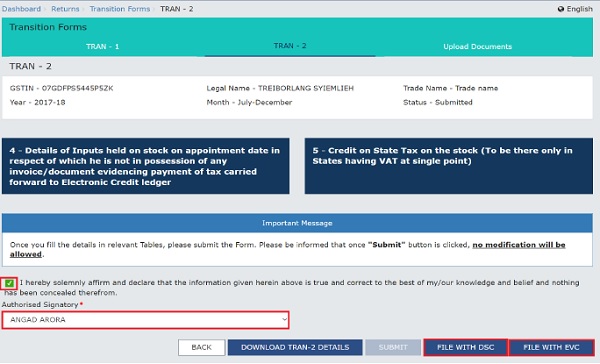
9. File TRAN – 2 with DSC or EVC
1. Select the checkbox for declaration.
2. From the Authorised Signatory drop-down list, select the authorized signatory.
3. Click the FILE WITH DSC or FILE WITH EVC button.
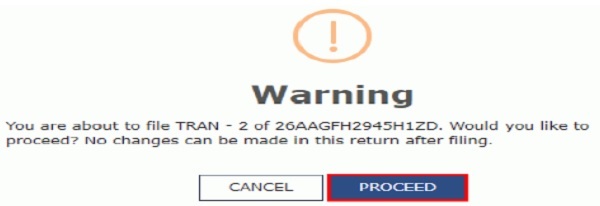
FILE WITH DSC:
a. Click the PROCEED button.
b. Select the certificate and click the SIGN button.
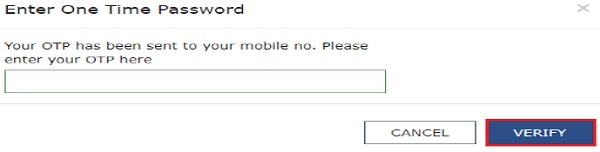
FILE WITH EVC:
a. Enter the OTP sent on email and mobile number of the Authorized Signatory registered at the GST Portal and click the VERIFY button.
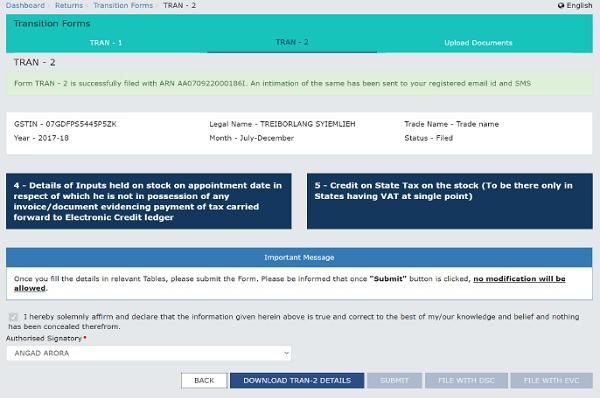
4. The success message is displayed and ARN is generated. The ARN is sent to taxpayer’s registered e-mail ID and mobile number.
Status of the TRAN – 2 changes from “Submitted” to “Filed”.