Introduction: Registering as a real estate agent with HRERA Panchkula is a crucial step in ensuring compliance with regulations. This comprehensive guide will take you through the step-by-step process of online agent registration, from understanding the regulations to submitting the required documents.
Analysis: The process begins with understanding The Haryana Real Estate Regulatory Authority (Registration of Agents), Regulations, 2018. Once you’ve familiarized yourself, you can start the online registration process by creating a login ID and password. Ensuring password compliance is crucial to avoid errors during this phase.
Collect all necessary documents, such as photographs, PAN cards, Aadhar cards, educational certificates, and address proofs. Depending on your entity type (individual, firm, or company), you’ll need specific documents like GST registration, MOA of the company, and more.
The step-by-step guide covers each phase, including filling out forms, adding director/partner details, calculating and depositing fees, uploading documents, and ensuring data accuracy. It emphasizes the importance of reviewing and amending forms before final submission, as amendments won’t be possible afterward.
Steps for on-line registration of agents with HRERA, Panchkula
Step-1
Read carefully The Haryana Real Estate Regulatory Authority (Registration of Agents), Regulations, 2018 by clicking on icon Regulations on the home page of HRERA, Panchkula.
Step-2
Before login and starting to fill up the forms for registration of Agent, the applicant should keep the following documents ready in the computer in soft copy:
(i) In case of Individual:-
(a) Photograph of the applicant, PAN card, Aadhar card which should be in JPEG/JPG or in PNG format.
(b) Educational certificate, Address proof of place of business.
(ii) In case of firm/society and company:-
(a) Photographs of the Directors, partners, sole proprietors etc. which should be in JPEG/JPG or in PNG format.
(b) Educational certificate, Address proof of place of business, PAN card of the company, Aadhar card, GST, MOA of the company, certificate of incorporation of the company.
Step-3
After reaching Home Page of HRERA, Panchkula (www.haryanarera.gov.in-* HRERA Panchkula), click on the icon “Agent Registration” then -* click on the icon “Signup to register a agent”. Following screen will come-up for creating login id and password. All fields must be filled up properly for creation of login id and password.
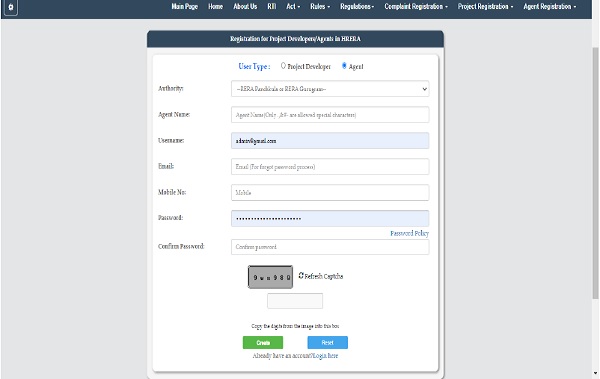
The email filled in the screen will become the login id of the applicant and the password filled shall become the login password for future use.
Note: For creating password following policy should be followed:
1. It must at least be 8characters.
2.The new password should not be the same as the previous 3 passwords.
3. It must contain Uppercase, lowercase, number and Special Characters.
4. If you do not set the password correctly, a message will be flashed “Your password is not as per Password Policy.” This implies that the password needs to be set again as per above guidelines.
Step-4
After online registration as shown in Step-3, the applicant should login in the following screen: –
 Step-5
After login, the Screen as shown under step 6 will show. Click on the icon “Agent Registration” for commencing the process of filling up of the form for online filing of the application for registration as an Agent. It is advised that facts of the Form REA-I may be viewed one by one to know the information required to be filled up. All the information required to be filled up in various forms should be collected beforehand and kept handy for filling up the forms.

Step-6
After clicking on the Icon “Agent Registration”, following screen will be visible. The process of filling up the form should be commenced by clicking on the tab “Agent Basic Details”.
All the fields should be filled up properly. After filling, click on the button “save and continue”.
If the information submitted is correct, after clicking on the save and continue button the system will automatically move to the next tab “Add Director/Partner”.
Step-7
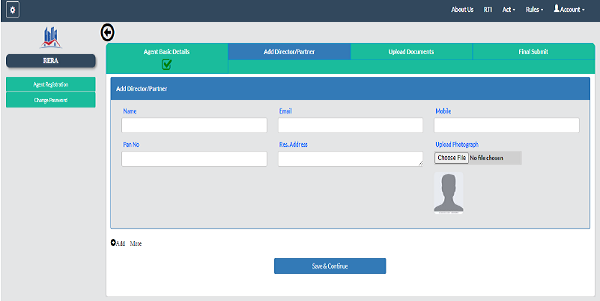
Click the icon “Add Director/Partner” and after which following screen will show:
 Step-8
Fill up all the fields. After filling up the details of each Director/Partner etc., photograph of the person concerned should be uploaded from the database by clicking on the icon “choose file”.
If the number of Directors/partners are more, click on the button “add more for giving the details in respect of additional persons.
Step-9
After filling up Form REA-I, requisite fee to be deposited in accordance with Rule 9(2) and 11(2) of the Rules should be calculated. Online payment for registration is available. The applicant may edit the forms any time before final submission.
Step-10
In some forms there is a facility of “add more”. If any additional information in the similar formats is to be provided, the additional columns can be added by clicking on the button “add more”.
Step-11
After filling up all the parts of REA-I, following screen will appear for uploading of the documents.
For uploading additional documents, click on the Icon “Add more”.

Step-12
Select each field one by one and upload documents from the already saved folder containing soft copies of the documents. The documents should be in PDF/JPG/PNG etc. format as per options. All documents with red star are mandatory without which the form will not be uploaded.
Step- 13
The entire form REA-I will remain saved in the system for accessing at any time. It can be accessed with the help of the User Id and Password. It will reach the Authority only after its final submission. Password can be changed after login.
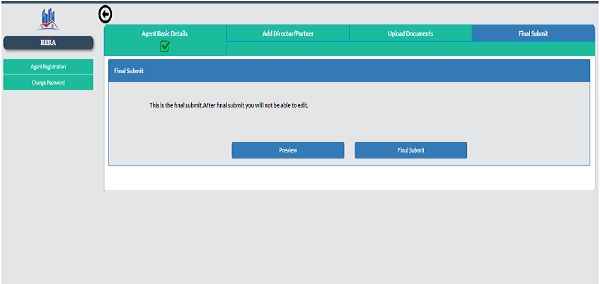
After filling up the entire form the applicant may preview filled up form by clicking on the preview button. If any amendment is to be carried out, the same may be done by going back to the relevant part of the form. The applicant may carry out any amendment in the form before submitting the same.
Please note that no amendment will be possible after finally submitting the form to the Authority. The applicant should double check the information filled up by pre-viewing the form before finally submitting to the Authority
Step-14
After final submission of on-line form, the system will generate a Temporary agent ID (Temp ID) e.g. RERA-PKL-1-2020. The Temp ID should be saved separately.
Step-15
After finally submitting the form the applicant should take two print outs of the form, one for submitting to the Authority in physical form and one for his office record. One hard copy of the following documents should also be enclosed: –
| 1. | Online Payment Receipt. |
| 2. | Self-attested copy of address proof of place of business. |
| 3. | Certificate of incorporation of the company. |
| 4. | GST registration. |
| 5. | Copy of PAN Card. |
| 6. | Proof of Residential address |
| 7. | Authenticated copy of registration in any other state or Union Territory. |
| 8. | Proof of last Educational Qualification. |
| 9. | Copy of the address proof, copy of Aadhar Card, Pan Card of partners/Directors of the Company, Society, Firm as required. |
| 10. | Copy of CIN No. and Pan Card of the company. |
| 11. | Any other documents (optional). |
Step-16
A hard copy of all the requisite documents as per Regulations and a physical copy of all the uploaded documents should be put into a file as required under the Regulations.
Step-17
Page Number the entire documents and prepare a forwarding letter as shown in the Regulations.
Step-18
Physically submit the hard copy of the form submitted online and one hard copy of all the documents. Mere screen shot of the documents submitted online will not be accepted.
Step-19
When the physical copies are delivered in the office of the Authority, a receipt will be generated where-after the application filed by the applicant for registration of an agent will become live and further process will commence.
Step-20
The applicant may check status of his application from time to time by clicking on the icon “SignIn to register a agent” on the home screen of HRERA, Panchkula.
Conclusion: Registering as a real estate agent with HRERA Panchkula demands meticulous attention to detail and adherence to regulations. Our comprehensive guide streamlines the online registration process, ensuring you meet all requirements seamlessly. Following these steps ensures your application aligns with HRERA guidelines, promoting transparency and consumer protection. Stay informed by periodically checking your application status online.