Article explains how is a GST payment Challan is generated for making payments without logging or after logging onto the GST Portal. It also explains how to retrieve the saved Challan and edit it and once a Challan is saved, it is valid for how many days?
Page Contents
A. Manual on Create Challan (Pre Login) under GST
1. How is a Challan is generated for making payments without logging onto the GST Portal?
To create and generate a Challan without logging onto the GST Portal, perform the following steps:
1. Access the https://www.gst.gov.in/ URL. The GST Home page is displayed.
2. Navigate to Services > Payments > Create Challan option.

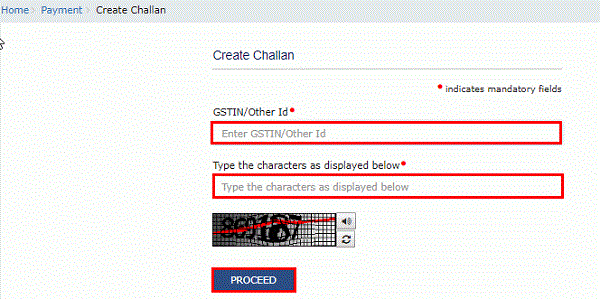
3. The Create Challan page is displayed.
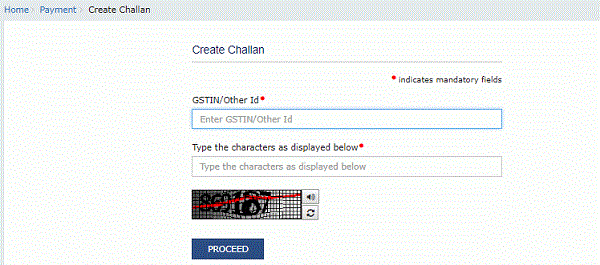
4. In the GSTIN/Other Id field, enter your GSTIN or Other ID.
5. In the Type the characters as displayed below field, enter the captcha text.
6. Click the PROCEED button.
7. The Create Challan page is displayed.
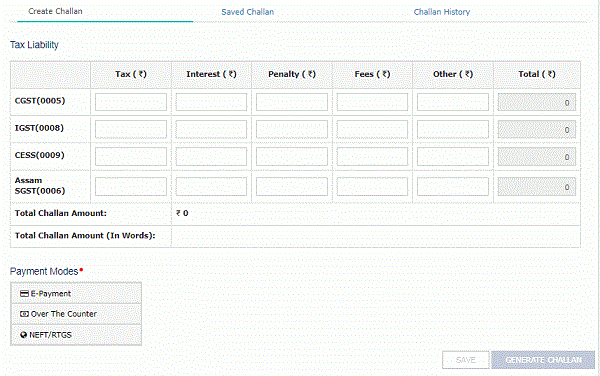
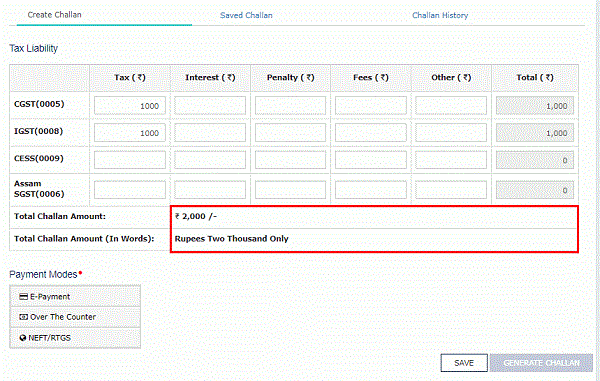
8. In the Tax Liability Details grid, enter the details of payment to be made.
Note:
- You can enter any amount irrespective of your liability which will get updated in your Electronic Cash Ledger which can be utilized later.
- Amount entered under any Minor head (Tax, Interest, Penalty, Fee and Others) and Major Head (CGST, IGST, SGST/UTGST, Cess) can be utilized only for that liability. Cross-utilization among Major and Minor heads are not possible.
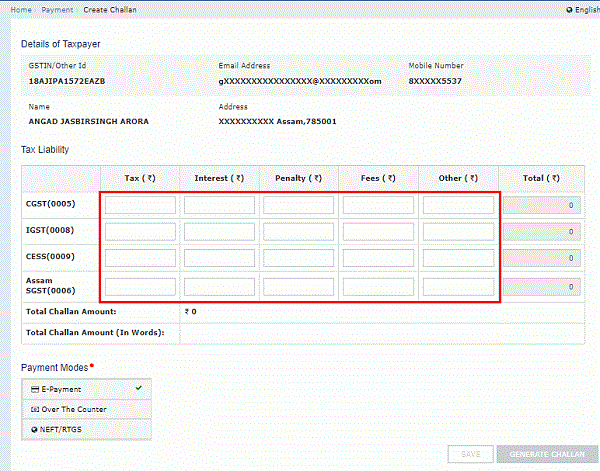
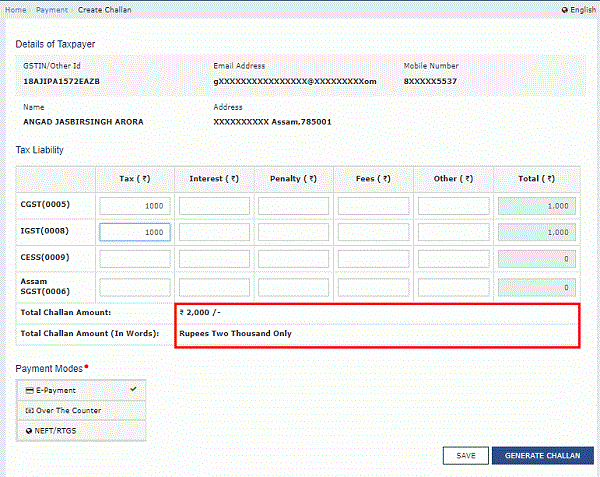
9. The Total Challan Amount field and Total Challan Amount (In words) fields are auto-populated with total amount of payment to be made.
10. In the Payment Modes option, select the appropriate choice.
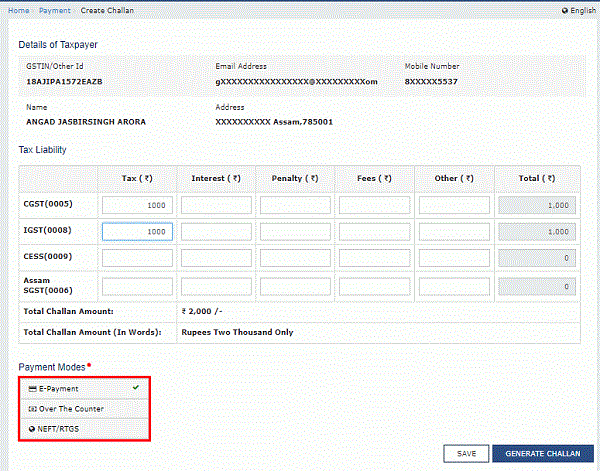
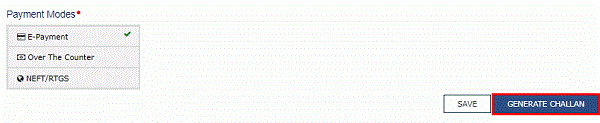
11 (a). In case of E-Payment
i. To generate the Challan, click the GENERATE CHALLAN button.

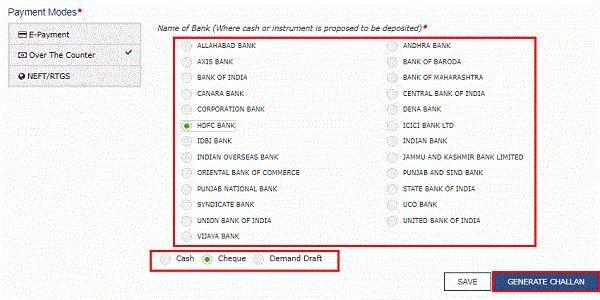
11 (b). In case of Over the Counter
i. Select the Name of Bank where cash or instrument is proposed to be deposited.
ii. Select the mode of deposit as Cash/ Cheque/ Demand Draft.
iii. To generate the Challan, click the GENERATE CHALLAN button.

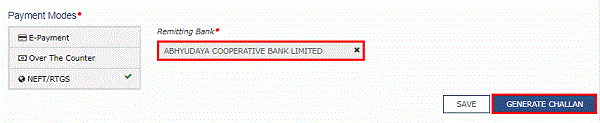
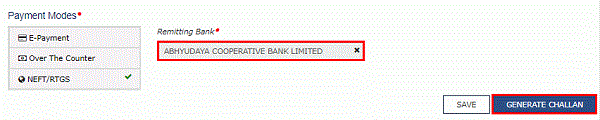
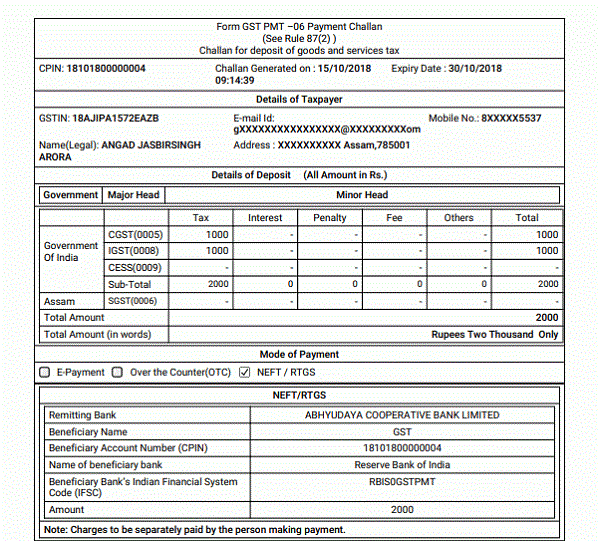
11 (c). In case of NEFT/RTGS
i. Select the Name of Remitting Bank.
ii. To generate the Challan, click the GENERATE CHALLAN button.
12. In the GSTIN/Other Id for Challan Generation field, enter the GSTIN o Other ID.
13. Click the PROCEED button.

14. The Challan is generated.
15. You can also download the GST Challan by clicking the DOWNLOAD button.
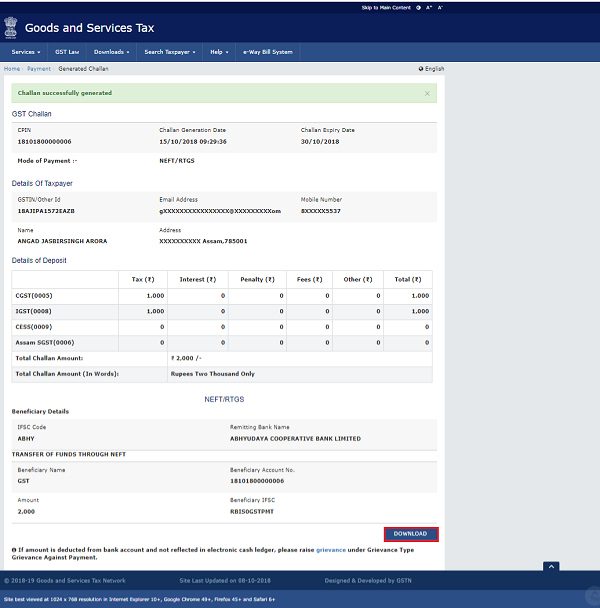
16. The Challan is downloaded.

B. Manual on Create Challan (Post Login) under GST
1. How can I generate a Challan for making payments after logging to the GST Portal?
To generate a Challan for making payments on the GST Portal, post-login, perform the following steps:
1. Access the https://www.gst.gov.in/ URL. The GST Home page is displayed.
2. Login to the GST Portal with valid credentials.
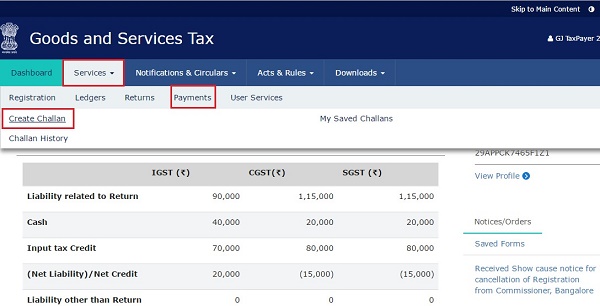
3. Navigate to Services > Payments > Create Challan option.

4. The Create Challan page is displayed.

5. In the Tax Liability Details grid, enter the details of payment to be made.
Note:
- You can enter any amount irrespective of your liability which will get updated in your Electronic Cash Ledger which can be utilized later.
- Amount entered under any Minor head (Tax, Interest, Penalty, Fee and Others) and Major Head (CGST, IGST, SGST/UTGST, Cess) can be utilized only for that liability. Cross-utilization among Major and Minor heads are not possible.

6. The Total Challan Amount field and Total Challan Amount (In words) fields are auto-populated with total amount of payment to be made.
7. In the Payment Modes option, select the appropriate choice.

8 (a). In case of E-Payment
i. To generate the Challan, click the GENERATE CHALLAN button.
8 (b). In case of Over the Counter
i. Select the Name of Bank where cash or instrument is proposed to be deposited.
ii. Select the mode of deposit as Cash/ Cheque/ Demand Draft.
iii. To generate the Challan, click the GENERATE CHALLAN button.
8 (c). In case of NEFT/RTGS
i. Select the Name of Remitting Bank.
ii. To generate the Challan, click the GENERATE CHALLAN button.
Note:
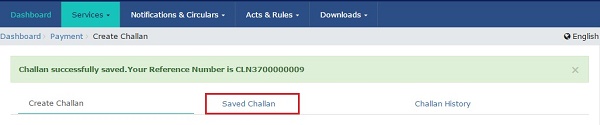
- You can click the SAVE button to save the challan and retrieve it later for editing.
- When you click the SAVE button, a unique reference number gets generated to track the saved challans. At any point of time only 10 challans can be saved.
- In case you have saved a Challan, you can retrieve it from Services > Payments > Saved Challans option.
9. The Challan is generated.
10. You can also download the GST Challan by clicking the DOWNLOAD button.

11. The Challan is downloaded.
C . How can I Access My Saved GST Challans (Post Login)
1. How can I retrieve the saved Challan and edit it? Once a Challan is saved, it is valid for how many days?
Saved Challans are only available post-login to the GST Portal. To retrieve the saved challan, perform the following steps:
1. Access the https://www.gst.gov.in/ URL. The GST Home page is displayed.
2. Login to the GST Portal with valid credentials.
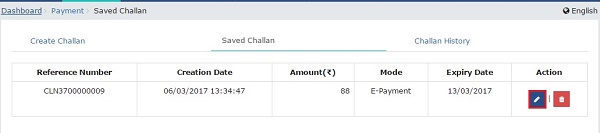
3. The Dashboard is displayed. Click the Services > Payments > My Saved Challans command.
–
4. The Saved Challans are displayed in a chronological order (most recently saved challan is shown first in the list).
Note:
• You can view or edit the saved challans within 7 days of the creation date. After 7 days, it will get purged from GST Portal.
• You can save maximum 10 challans at any point of time.
5. Under Action column, you can click the Edit button to edit the saved challan.