How can I create and file details for export invoice summary in Table 6A of FORM GSTR-1?
To create and file details for export invoice summary in Table 6A of FORM GSTR-1, perform the following steps:
- Login and Navigate to Table 6A of FORM GSTR-1 page
- Enter details in Export Invoices Summary page
- Preview Table 6A of FORM GSTR-1
- File Table 6A of FORM GSTR-1 with DSC/ EVC
- View Table 6A of FORM GSTR-1 Status
1. Login and Navigate to Table 6A of Form GSTR-1 page
1. Access the www.gst.gov.in URL. The GST Home page is displayed.
2. Login to the GST Portal with valid credentials.
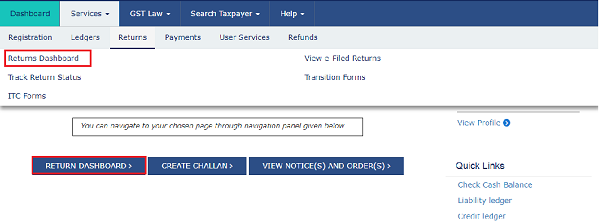
3. Click the Services > Returns > Returns Dashboard command.
Alternatively, you can also click the Returns Dashboard link on the Dashboard.
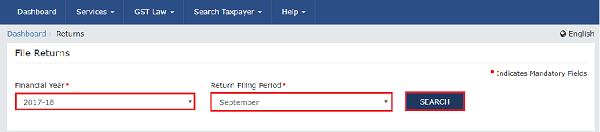
4. The File Returns page is displayed. Select the Financial Year & Return Filing Period (Month) for which you want to file the return from the drop-down list.
5. Click the SEARCH button.
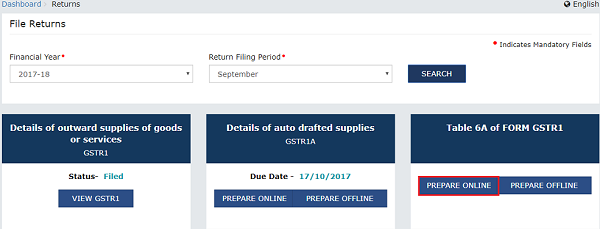
6. The File Returns page is displayed. This page displays the due date of filing the returns, which the taxpayer is required to file using separate tiles.
In the Table 6A of FORM GSTR1 tile, click the PREPARE ONLINE button if you want to prepare the return by making entries on the GST Portal.
Note:
- You cannot file Table 6A of FORM GSTR1 if GSTR1 is Submitted/ Filed for current return period.
2. Enter details in Export Invoices Summary page
1. Click the ADD DETAILS button to add a new invoice.
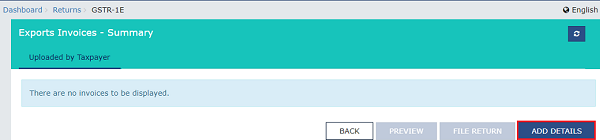
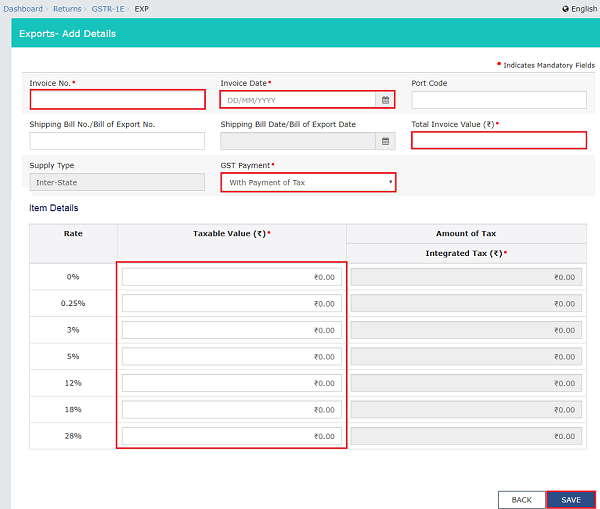
The Exports- Add Details page is displayed.
4. In the Invoice No. field, enter the invoice number.
5. In the Invoice Date field, select the date on which the invoice was generated using the calendar.
6. In the Port Code field, enter the port code.
7. In the Shipping Bill No./Bill of Export No. field, enter the shipping bill number or bill of export number.
Once you enter the shipping bill number or bill of export number, Shipping Bill Date/Bill of Export Date field is enabled.
8. In the Shipping Bill Date/Bill of Export Date field, select the date on shipping bill or bill of export was generated using the calendar.
9. In the Total Invoice Value field, enter the total invoice value.
10. Select whether GST payment is with payment of tax or without payment of tax from the GST Payment drop-down list.
11. In the Taxable Value field against the rates, enter the taxable value of the goods or services.
Note: The Amount of Tax fields are auto-populated based on the values entered in Taxable Value fields respectively. However, the taxpayer can edit the tax amount.
12. Click the SAVE button to save the invoice details.
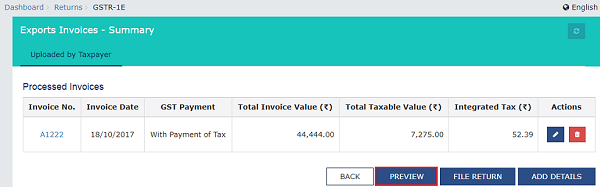
You will be directed to the previous page and a message is displayed that Request accepted successfully.

3. Preview Table 6A of FORM GSTR-1
Once you have added invoices, click the PREVIEW button.
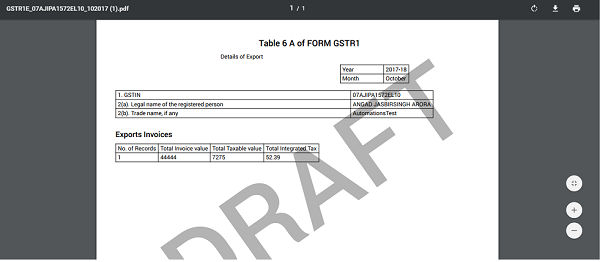
This button will download the draft Summary page of Table 6A of FORM GSTR1 for your review. It is recommended that you download this Summary page and review the summary of entries made in Export Invoices section with patience before submitting the Table 6A of FORM GSTR1.
The PDF file generated would bear watermark of draft as the details are yet to be filed.
4. File Table 6A of FORM GSTR-1 with DSC/EVC
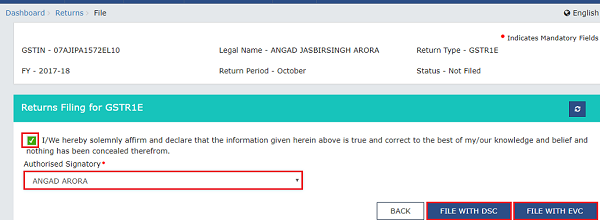
1. Click the FILE RETURN button.

2. The Returns Filing for GSTR1E page is displayed. Select the Declaration checkbox.
3. In the Authorised Signatory drop-down list, select the authorized signatory. This will enable the two buttons – FILE WITH DSC or FILE WITH EVC.
4. Click the FILE WITH DSC or FILE WITH EVC button to file Table 6A of FORM GSTR1.
Note: On filing of the Table 6A of FORM GSTR1, notification through e-mail and SMS is sent to the Authorised Signatory.
FILE WITH DSC:
a. Click the PROCEED button.
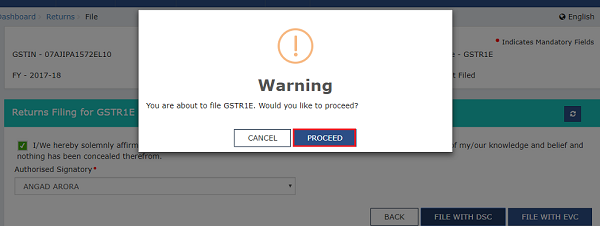
b. Select the certificate and click the SIGN button.
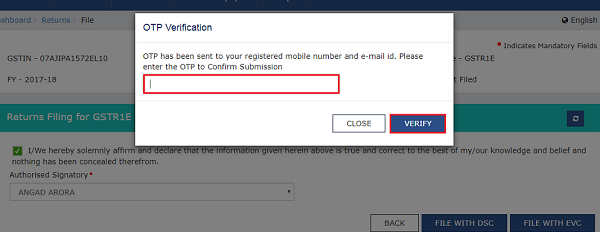
FILE WITH EVC:
a. Enter the OTP sent on email and mobile number of the Authorized Signatory registered at the GST Portal and click the VERIFY button.
5. The success message is displayed.Status of the Table 6A of FORM GSTR-1 return changes to “Filed”

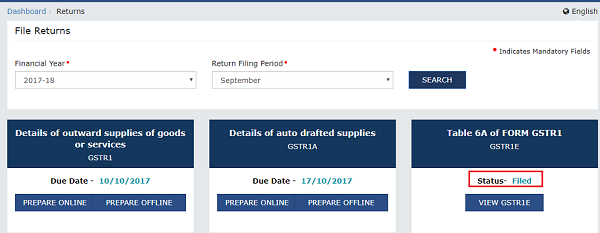
5. View Table 6A of FORM GSTR-1 Status
1. The File Returns page is displayed. Select the Financial Year & Return Filing Period (Month) for which you want to view the return from the drop-down list.
2. Click the SEARCH button.

Status of the Table 6A of FORM GSTR-1 return changes to “Filed”.


WHETHER IS IT NECESSARY FOR AN EXPORTER TO FILE TABLE 6A EXPORT SUMMARY IN GSTR 1 WHO HAS EXPORTED THE GOODS WITHOUT PAYMENT OF GST???
if any offline uploading invoices info(more than 500 lines) there table 6A.