Introduction
As per the Notification No. 116/2016, the Pradhan Mantri Garib Kalyan Yojana (PMGKY), 2016, is a declaration u/s 199C of the Finance Act, 2016, in respect of the Taxation and Investment Regime for PMGKY. There are two forms, Form 1 & Form 2.
Form 1 (PMGKY) is a declaration of amount held in cash or deposit in an account maintained with bank/post office etc.
Form 2 (PMGKY) is an Acknowledgement issued to the declarant by the jurisdictional Principal Commissioner or Commissioner.
Pre-Requisites for Uploading Form 1 (PMGKY)
⇒ To upload Form1 (PMGKY), user should have a valid PAN and should be registered in e-Filing portal.
⇒ Form1 (PMGKY) can be filed online using either DSC or If the user opts to use the DSC facility, a valid DSC should be registered in e-Filing portal.
⇒ Form 1 (PMGKY) can be submitted using EVC options in available in e-Filing
⇒ Scanned copies of Proof of payment of Total Taxes and Proof of deposit in Pradhan Mantri Garib Kalyan Deposit Scheme, 2016 should be kept ready for upload.
Prepare and Submit Online Form 1 (PMGKY)
To Prepare and Submit Online Form 1, the steps are as below:
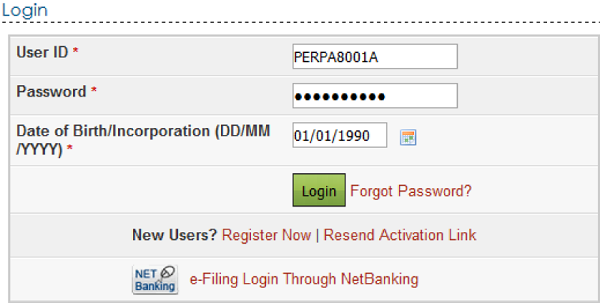
⇒ Step 1: In e-Filing Homepage, Click on “Login Here”

⇒ Step 2: Enter User ID (PAN), Password, DOB/DOI and Captcha. Click
⇒ Step 3: Post login, go to PGMGKY à Prepare and Submit Online Form (Prepare and Submit Online Form 1, PMGKY)

⇒ Step 4: User will be redirected to the following page where the user can select the option to whom to submit the “Form 1”.
If the user selects “Jurisdictional PCIT/CIT”, then the user can go ahead to fill and submit “Form 1” using either DSC or EVC.

⇒ Step 5: If the user selects “CIT (CPC), Bengaluru”, then the user can fill and submit “Form 1(PMGKY)” only using

⇒ Step 6: After selecting the option, the user can click on “Continue” to open “Form 1(PMGKY)”
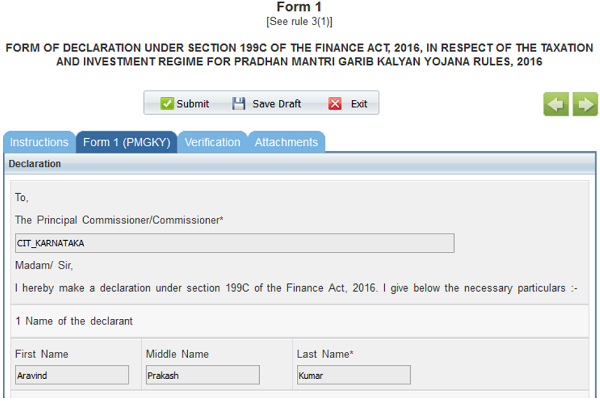
- The PCIT/CIT details shall be auto-populated from the database. If not auto-populated, the user can enter the details.
- Name of the assesse shall be auto-populated from the login Profile.
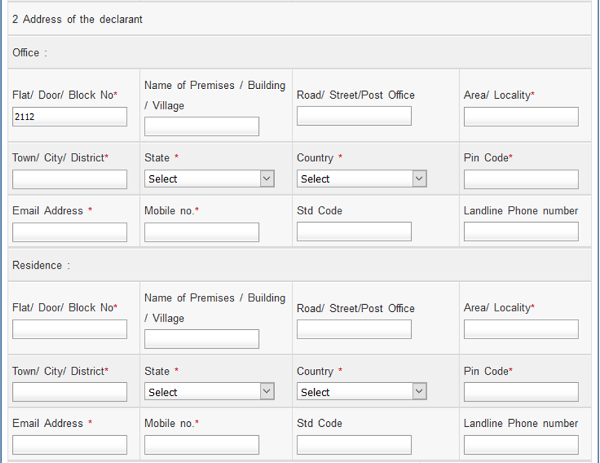
- Address should be entered by the user. Either Office or Residence address is mandatory.
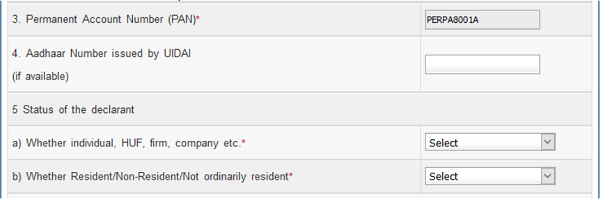
- PAN shall be auto-populated from the login profile.
- Aadhaar Number can be entered by the user. If the Aadhaar is already linked in the profile, the same shall be pre-filled.
- Status of the declarant should be selected by the user.
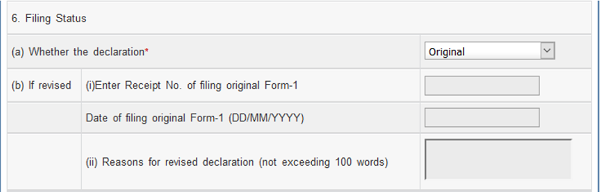
- The user should specify the “Filing Status” as Original or Revised.
- If the declaration is “Revised”, then the user should enter the following details
√ Receipt No. of filing original Form-1
√ Date of filing original Form-1
√ Reasons for revised declaration
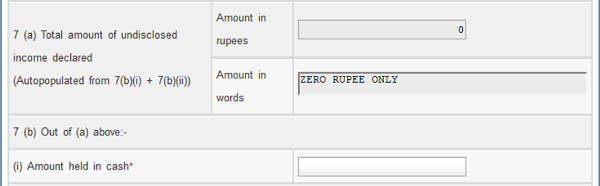
- The “Total amount of undisclosed income declared” shall be Auto-populated from the total of [Pt No. 7(b)(i) + Pt No. 7(b)(ii)]. The amount is displayed in Rupees and in Words.
- The “Amount held in cash” should be entered by the user. Only numbers are allowed, no decimals.
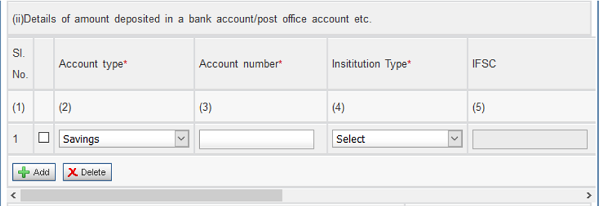
- The “Details of amount deposited in a bank account/post office account etc.” should be entered by the user as follows:
√ Account type can be selected from the drop down as Savings, Current, Cash Credit, Fixed Deposit, and Recurring Deposit.
√ Account number should be entered by the user as per the valid number allocated by the Bank/Post-office etc.
√ Institution Type can be selected from the drop down as Bank, Post Office, NBFC, Others.
√ IFSC should be entered by the user, if Institution Type is selected as “Bank”. This should be a valid IFSC of the Bank Branch.
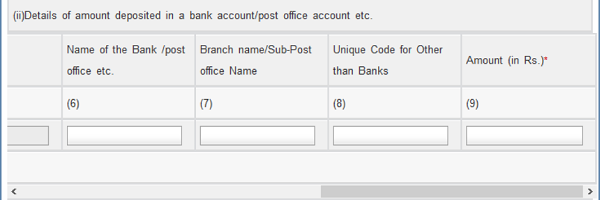
√ Name of the Bank /post office etc. should be entered by the user. If a valid IFSC is entered, the Name of the Bank shall be auto-populated.
√ Branch name/Sub-Post office Name should be entered by the user.
√ Unique Code for Other than Banks should be entered by the user, if Institution Type is selected as other than “Bank”.
√ Amount should be entered by the user. Only numbers are allowed, no decimals.
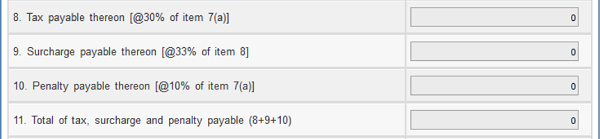
- Tax, Surcharge, Penalty and Total are auto-calculated based on the data entered by the user.

- Details of amount paid on or before the date of declaration should be entered by the user as follows:
√ BSR Code of Bank
√ Date of Deposit
√ Serial Number of Challan
√ Amount
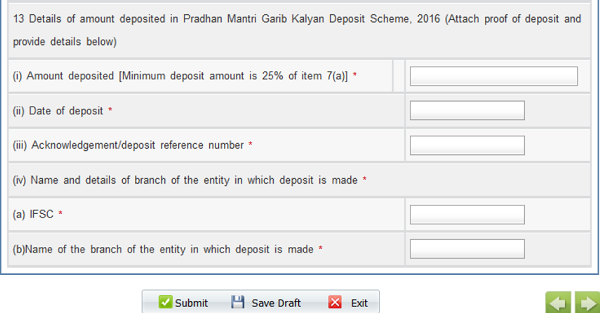
- Details of amount deposited in Pradhan Mantri Garib Kalyan Deposit Scheme, 2016 should be entered by the user as follows:
√ Amount deposited should be minimum 25% of the Total amount of undisclosed income declared at Pt No. 7(a).
√ Date of deposit should be in DD/MM/YYYY format.
√ Acknowledgement/deposit reference number should be a valid number allocated by the specified entity.
√ Name and details of branch of the entity in which deposit is made should be provided as a valid IFSC & Name of the Bank.
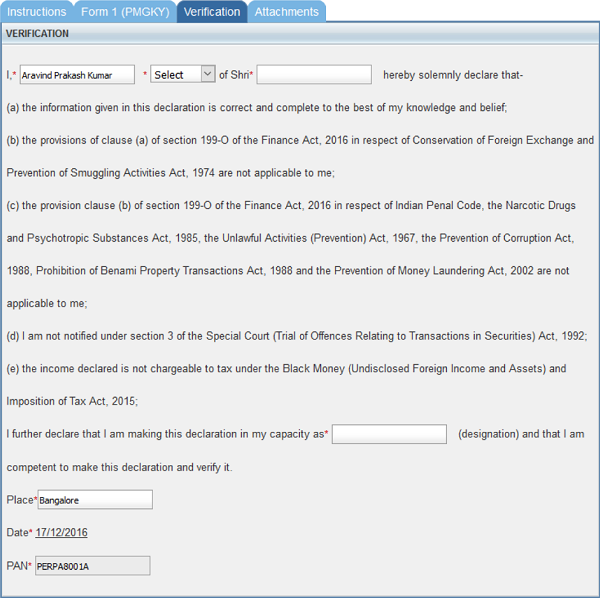
- Under Verification, the user should select an option from the drop down as Son/Daughter/Wife and enter the name accordingly.
- Capacity under which declaration is being made should be entered.
- Place should be entered by the user.
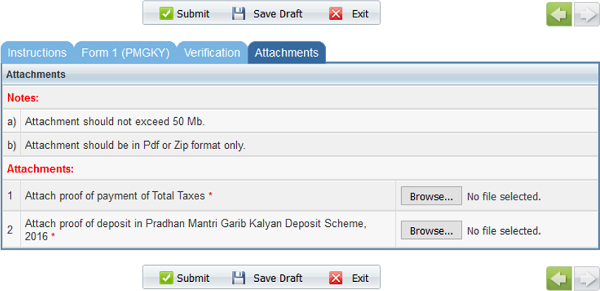
- Step 7: Under the “Attachments” sheet, the below attachments should be uploaded mandatorily.
♦ Proof of payment of Total Taxes
♦ Proof of deposit in Pradhan Mantri Garib Kalyan Deposit Scheme, 2016
- Step 8: On successful validation, the user can click on “Submit”.
Submit Online Form 1 Using EVC
⇒ Form 1 can be e-Verified using any of the following options.
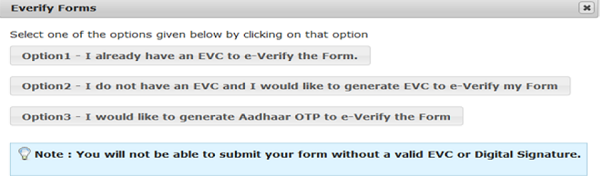
⇒ If the user selects Option 1 -I already have an EVC to e-verify the Form, the following screen appears.

⇒ Enter the Electronic Verification Code (EVC) and click on “Submit”
⇒ If the user selects Option2 –I do not have EVC and I would like to generate EVC to e-verify my Form, the following screen appears.
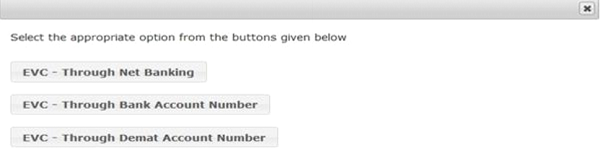
For more details on using EVC- Through Net Banking, EVC- Through Bank Account Number, EVC- through Demat Account Number, please refer user manual “e-Verification of Returns” under Help section
⇒ If the user selects Option3- I would like to generate Aadhaar OTP to e-Verify the Form, the below screen appears.
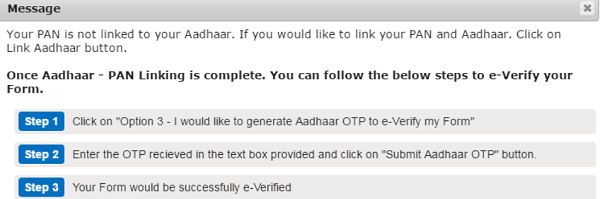
⇒ Follow the above-mentioned steps accordingly to e-Verify the form using Aadhaar OTP.
Submit Online Form 1 Using DSC
⇒ If the user has a registered DSC, the following screen appears on submission of the Form.
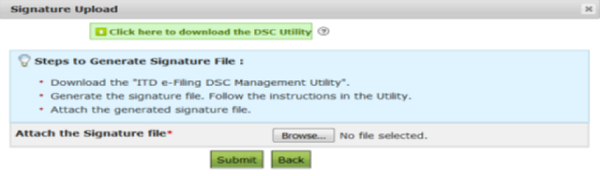
⇒ “Attach the Signature file”: Upload the signature file generated using DSC Management Utility for the uploaded XML file. For further details on generating Signature file click here. Navigate to Step by Step Guide for Uploading XML. On Successful submission a success message will be displayed on the screen.


