- 1. Why do I need to file transition Form GST TRAN – 2?
- 2. What do I need to fill in the transition Form GST TRAN – 2?
- 3. What do I need to do to submit the transition Form GST TRAN – 2?
- 4. By when do I need to file the transition Form GST TRAN – 2?
- 5. Can I make any amendment to the transition Form GST TRAN – 2?
- 6. Do I need to attach any document along with transition Form GST TRAN – 2?
- 7. What will happen once the transition Form GST TRAN – 2 is filed?
- 8. I am not able to file transition Form GST TRAN – 2. Why?
- 9. Can I add any new stock in Form GST TRAN – 2 for applicable tax periods?
- 10. Can Form GST TRAN – 2 be filed through offline mode?
- 11. I am not able to add any new details in Form GST TRAN – 2 as ADD DETAILS button is disabled. Why?
- 12. I am not able to delete details which have been added in previous month in Form GST TRAN – 2. Why?
- Manual > Transition Form GST TRAN – 2
- How can I file transition form GST TRAN – 2?
- 1. Login and Navigate to Transitions Forms > TRAN – 2 page
- 5. File TRAN – 2 with DSC or EVC
1. Why do I need to file transition Form GST TRAN – 2?
Every registered person who is eligible to take credit in his/her Electronic Credit Ledger of eligible duties and taxes paid under existing laws in respect of inputs, in respect of which he is not in possession of invoice or any other documents evidencing payment of duty or tax, needs to declare such stock in Form GST TRAN – 1. Subsequently he is required to file Form GST TRAN – 2, at the end of each six tax period from the appointed date in which such stock is sold and central/state tax is paid by the taxpayer and claim ITC as applicable percentage of the tax paid under GST.
You need to submit the transition Form GST TRAN – 2 to report the details of supplies made in GST Act in respect of stock of inputs not supported by duty paying invoices under existing laws declared in GST TRAN – 1. (Refer Rule 117(4) of CGST Rules for details)
2. What do I need to fill in the transition Form GST TRAN – 2?
You need to fill the details of supplies made on or after the appointed day, in the particular tax period, of the goods held in stock on appointed day in respect of which he is not in possession of any document evidencing payment of central excise duty.
3. What do I need to do to submit the transition Form GST TRAN – 2?
You need to login to the GST Portal and navigate to Services > Transition Form > TRAN – 2. Fill and submit the form and file by attaching DSC/ EVC.
4. By when do I need to file the transition Form GST TRAN – 2?
Transition form GST TRAN – 2 has to be filed at the end of each of the six tax period, only when taxpayer has filed the Form GST TRAN – 1 and also filed valid return of that tax period. Form GST TRAN – 2 shall be available for six tax periods from the appointed day (1st July 2017).
5. Can I make any amendment to the transition Form GST TRAN – 2?
There is no option for revision or amendment of transition Form GST TRAN – 2. Form GST TRAN- 2 can only be filed only once for one tax period.
6. Do I need to attach any document along with transition Form GST TRAN – 2?
There is no requirement for uploading any documents as an attachment along with transition Form GST TRAN – 2.
7. What will happen once the transition Form GST TRAN – 2 is filed?
Once the transition Form GST TRAN – 2 is successfully filed, ARN is generated and transition credit will be credited to the Electronic Credit Ledger of GSTIN mentioned in the form.
8. I am not able to file transition Form GST TRAN – 2. Why?
If you have not filed transition Form GST TRAN – 1, you cannot file Form GST TRAN – 2, without first filing Form GST TRAN – 1.
If you have not filed valid GSTR-3B return for that period, you cannot file Form GST TRAN – 2 for that period for which you have not filed valid GSTR-3B return.
9. Can I add any new stock in Form GST TRAN – 2 for applicable tax periods?
Yes, you can add new stock details HSN line items in Form GST TRAN – 2, in all applicable tax periods. In case you have missed adding any HSN line item details in previous month Form GST TRAN -2, as you had not sold /supplied these items in that month, you can add these HSN line item details in next month by clicking on ADD DETAILS button. However, as per law you can add only those HSN line items which you have already declared in your furnished Form GST TRAN.
10. Can Form GST TRAN – 2 be filed through offline mode?
Yes, the facility for uploading data after preparing through offline tool for the central tax and state tax tables would be made available soon to the taxpayers. The steps for the offline upload of data is delineated in the user manual.
11. I am not able to add any new details in Form GST TRAN – 2 as ADD DETAILS button is disabled. Why?
ADD DETAILS button is enabled only if Form GST TRAN-2 for previous tax period is filed.
12. I am not able to delete details which have been added in previous month in Form GST TRAN – 2. Why?
You can only delete those records which have been added in the same tax period and Form GST TRAN 2 is yet to be filed for the said tax period. Previous tax period records cannot be deleted.
Manual > Transition Form GST TRAN – 2
How can I file transition form GST TRAN – 2?
To file transition form GST TRAN – 2, perform the following steps:
1. Login and Navigate to Transitions Forms > TRAN – 2 page
2. Enter details in various tiles
- Online Mode
- Offline Mode
3. Preview TRAN-2
4. Submit TRAN – 2 to freeze data
5. File TRAN – 2 with DSC or EVC
1. Login and Navigate to Transitions Forms > TRAN – 2 page
1. Access the www.gst.gov.in URL. The GST Home page is displayed.
2. Login to the GST Portal with valid credentials.
3. Click the Services > Returns > Transition Forms command.

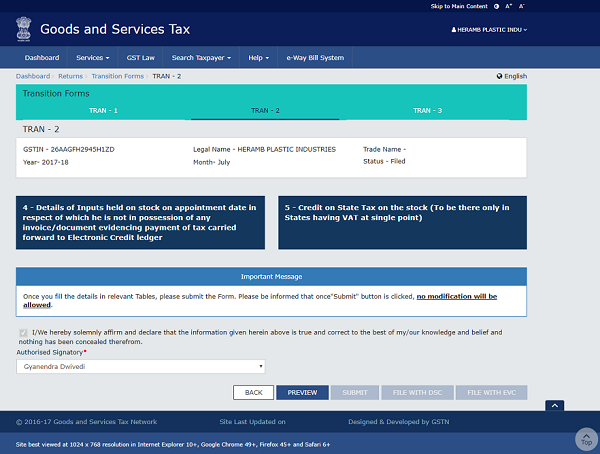
4. The Transition Forms page is displayed. The tabs of transition forms TRAN – 1/ TRAN – 2/ TRAN – 3 are visible in the top band. Tiles of Form TRAN – 1 will be visible by default. Click the TRAN – 2 tab.

5. Select the Year& Month for which you want to file the TRAN-2 from the drop-down list.
6. Click the SEARCH button.
Note: You need to file GSTR-3 or GSTR-3B for the selected period. You will able to file ‘FORM GST TRAN – 2’ only once valid return has been filed for the selected period.

2. Enter details in various tiles
There are a number of tiles representing different Tables to enter relevant details. You can enter details in these tiles through online/ offline mode.
Online Mode
4 – Details of Inputs held on stock on appointment date in respect of which he is not in possession of any invoice/document evidencing payment of tax carried forward to Electronic Credit ledger
Note: In case you have not declared anything in part 7B of table 7(a) of TRAN-1, you will not be permitted to fill any details in Table 4 of TRAN-2.
1. Click the 4 – Details of Inputs held on stock on appointment date in respect of which he is not in possession of any invoice/document evidencing payment of tax carried forward to Electronic Credit ledger tile.

2. Click the ADD DETAILS button to add a new invoice.

3. In the HSN field, enter the HSN code as per applicable provision of reporting HSN code same as what you entered in the TRAN 1 form in table 7(a) with option “No.” for the field “invoice evidencing payment of duty”.
4. In the Description field, enter the description. (Either HSN or Description should be mandatorily entered)
5. In the UQC field, select UQC.
6. In the Qty. field, enter the quantity of the opening stock for the tax period declared earlier in Table 7(a) of Tran 1.
7. In the Qty. field, enter the quantity for the outward supply made in the tax period.
8. In the Value field, enter the total value of the outward supply made in the tax period.
9. In the Central Tax field, enter the central tax paid on the outward supply of the goods made in the tax period.
10. In the Integrated Tax field, enter the integrated tax paid on the outward supply of the goods made in the tax period.
11. In the ITC Allowed field, enter the ITC allowed on the central tax and integrated tax paid on the outward supply depending on the tax rate of the sold/supplied goods.
12. Click the ADD button.

You will be directed to the previous page and invoice is added. You can click the EDIT button to edit the invoice or DELETE button to delete the invoice here.

Note:
- In case you have missed adding any HSN line item details in this month, you can add details in the next month by clicking ADD Details button, while filing Form GST TRAN 2 for the said tax period.
- ADD Details button is enabled only if Form GST TRAN-2 for previous month is filed.
- You can only delete those records which have been added in the same month. Details added in previous tax periods cannot be deleted.
- You can add outward supplies details of HSN line items record which have been added in the previous month. However, opening stock would be un-editable.
Download Processed Records
Once files are updated, you can download the processed records (Both Online and Offline) in CSV format to verify the recorded added during upload. Click the Click here link.

Processed records in CSV format are downloaded to verify the recorded added during upload.

5 – Credit on State Tax on the stock (To be there only in States having VAT at single point)
Note: In case you have not declared anything in table 7(d) of TRAN-1, you cannot fill any details in table 5 of TRAN-2.
1. Click the 5 – Credit on State Tax on the stock (To be there only in States having VAT at single point) tile.

2. Click the ADD DETAILS button to add a new invoice.

3. In the HSN field, enter the HSN code as per applicable provision of reporting HSN code.
4. In the Description field, enter the description. (Either HSN or Description should be mandatorily entered) as declared in the table 7(d) of TRAN 1.
5. In the UQC field, select UQC.
6. In the Qty. field, enter the quantity of the opening stock for the tax period as declared in the table 7(d) of TRAN 1.
7. In the Qty. field, enter the quantity for the outward supply made in the tax period.
8. In the Value field, enter the total value of the outward supply made in the tax period.
9. In the State/UT Tax field, enter the State/ UT tax paid on the outward supply made in the tax period.
10. In the Integrated Tax field, enter the integrated tax paid on the outward supply made in the tax period.
11. In the ITC Allowed field, enter the ITC allowed as a percentage of the State/ UT/ Integrated tax paid depending on tax rate on the outward supply made in the tax period.
12. Click the ADD button.

You will be directed to the previous page and invoice is added. You can click the EDIT button to edit the invoice or DELETE button to delete the invoice here.

Download Processed Records
Once files are updated, you can download the processed records (Both Online and Offline) in CSV format to verify the recorded added during upload. Click the Click here link.

Processed records in CSV format are downloaded to verify the recorded added during upload.

Offline Mode
4 – Details of Inputs held on stock on appointment date in respect of which he is not in possession of any invoice/document evidencing payment of tax carried forward to Electronic Credit ledger
Note: In case you have not declared anything in part 7B of table 7(a) of TRAN-1, you will not be permitted to fill any details in Table 4 of TRAN-2.
1. Click the 4 – Details of Inputs held on stock on appointment date in respect of which he is not in possession of any invoice/document evidencing payment of tax carried forward to Electronic Credit ledger tile.

Note: You can use ‘JSON File Upload’ functionality if you have larger number of records. This facility would be operational soon. Use Online ‘Add Details’ functionality for adding lesser records.
Download the sample JSON file:
1. Click the Click here link to download the same JSON file.

2. Click the PROCEED button.

3. Once downloaded, open the JSON file, fill the details and save it.
4. Click the Choose File button.

5. Select the JSON file and click the Open button.
A success message is displayed that the JSON file is saved successfully.
5 – Credit on State Tax on the stock (To be there only in States having VAT at single point)
Note: In case you have not declared anything in table 7(d) of TRAN-1, you cannot fill any details in table 5 of TRAN-2.
1. Click the 5 – Credit on State Tax on the stock (To be there only in States having VAT at single point) tile.

Note: You can use ‘JSON File Upload’ functionality if you have larger number of records. This offline functionality would be made operational soon. Use Online ‘Add Details’ functionality for adding lesser records.
Download the sample JSON file:
1. Click the Click here link to download the same JSON file.

2. Click the PROCEED button.

3. Once downloaded, open the JSON file, fill the details and save it.
4. Click the Choose File button.

5. Select the JSON file and click the Open button.
A success message is displayed that the JSON file is saved successfully.
3. Preview TRAN-2
Once you have entered all the details, click the PREVIEW button. This button will download the draft Summary page of your TRAN-2 for your review. It is recommended that you download this Summary page and review the summary of entries made in different sections with patience before submitting the TRAN-2. The PDF file generated would bear watermark of draft as the details are yet to be submitted.
Note: The submit button will freeze TRAN-2 for that particular month.

The PDF is displayed.

4. Submit TRAN – 2 to freeze data
1. Click the SUBMIT button to freeze the TRAN – 2.
Please note that after submit, no modification is possible. Hence ensure that details are filled correctly before clicking on Submit button.

2. Click the PROCEED button to submit the TRAN – 2.

3. A success message is displayed at the top of the page. Once you submit the data, data is frozen and you cannot change any fields.

Refresh the page and status of the TRAN – 2 – is changed from “Not filed” to “Submitted”.
4. Click the PREVIEW button again, to download the submitted TRAN-2 in PDF format.

The PDF file generated would now bear watermark of final Form GST TRAN-2.

5. File TRAN – 2 with DSC or EVC
1. Select the checkbox for declaration.
2. From the Authorised Signatory drop-down list, select the authorized signatory.
3. Click the FILE WITH DSC or FILE WITH EVC button.

FILE WITH DSC:
a. Click the PROCEED button.

b. Select the certificate and click the SIGN button.
FILE WITH EVC:
a. Enter the OTP sent on email and mobile number of the Authorized Signatory registered at the GST Portal and click the VERIFY button.
 4. The success message is displayed and ARN is generated. The ARN is sent to taxpayer’s registered e-mail ID and mobile number.
Status of the TRAN – 2 changes from “Submitted” to “Filed”.


When I will get the credit of gst for the amount of 60% or 40% of the CGST filed by me in tran 2 ?
is the date for claiming of tran1-2 cenvat inputs in closing stocks as on 30.06.17 is still open and can be filed upto 30.06.2018- pls clarify is the date extended after dec17 or not . upto june18 if any .