A. How to download and import prefilled XML to Excel ITR utility?
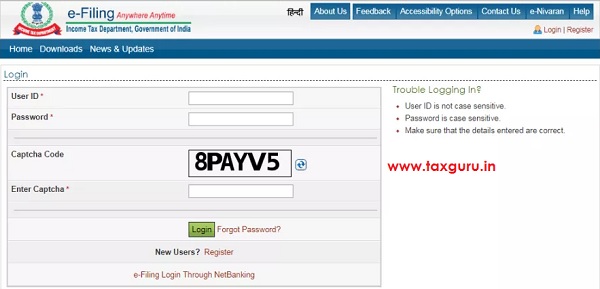
Step 1: Go to Income Tax e-Filing Portal www.incometaxindiaefiling.gov.in
Step 2: Login to the e-Filing portal by entering the User ID (PAN), Password and Captcha.
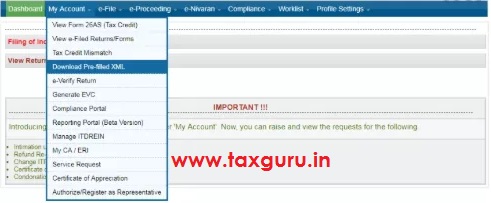
Step 3: After Login, Go to ‘My Account’ menu and Click on ‘Download Pre-filled XML’.
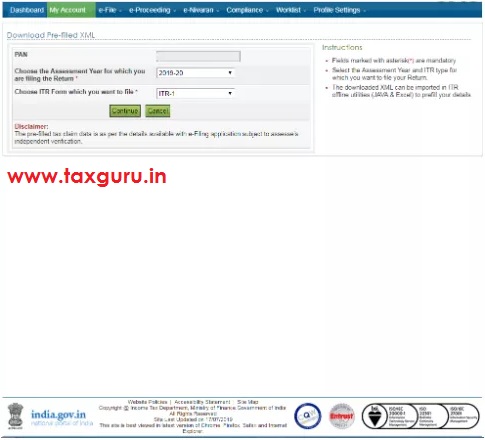
Step 4: In the ‘Download Pre-filled XML’ page, the PAN will be auto populated, choose the Assessment Year for which you are filing the Return. Chose the ITR Form, which you want to file from the dropdown. Click ‘Continue’ button.
Step 5: The details that will get prefilled to the ITR utility along with the bank account details that are available with e-Filing portal (if any) will be displayed to the user. Choose the bank account for credit refund, if any.
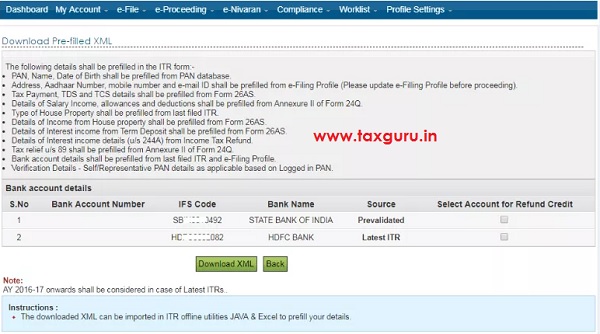
Step 6: Click on the ‘Download XML’ button to download the pre-filled XML (By default it will be in ‘Downloads’ folder of the system).
Step 7: Open the ITR excel utility and click ‘Import Personal and Tax Details from Prefilled XML’ button from the right side panel.

Step 8: Browse and select the downloaded pre-fill XML file and click on ‘Open’ button.

Step 9:All the data available with e-Filing portal will be prefilled into the ITR excel utility.
Note: Same steps to be followed for respective ITRs using Excel utilities.
B. How to download and import prefilled XML to Java ITR utility?
Step 1: Go to Income Tax e-Filing Portal www.incometaxindiaefiling.gov.in
Step 2: Login to the e-Filing portal by entering the User ID (PAN), Password and Captcha.
Step 3: After Login, Go to ‘My Account’ menu and Click on ‘Download Pre-filled XML’.
Step 4: In the ‘Download Pre-filled XML’ page, the PAN will be auto populated, choose the Assessment Year for which you are filing the Return. Chose the ITR Form, which you want to file from the dropdown. Click ‘Continue’ button.
Step 5: The details that will get prefilled to the ITR utility along with the bank account details that are available with e-Filing portal (if any) will be displayed to the user. Choose the bank account for credit refund, if any.
Step 6: Click on the ‘Download XML’ button to download the pre-filled XML (By default it will be in ‘Downloads’ folder of the system).
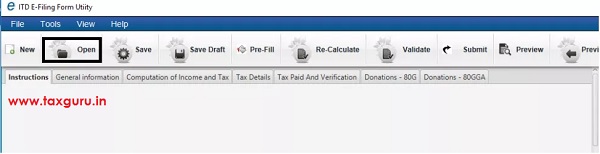
Step 7: Open the ITR Java utility and Click on ‘Open’ button from the Menu bar.
Step 8: Browse and select the downloaded pre-fill XML file and click on ‘Open’ button.
Step 9: All the data available with e-Filing portal will be prefilled into the ITR Java utility.
Note: Same steps to be followed for respective ITRs using Java utilities.


This is not available in the new incometax website