Upload Income Tax Forms – FAQs
Q.1 How can I access the category of Income Tax Form applicable to me for filing?
Ans. Under the Income Tax Form Options in the e-File menu, you will be presented with a category list of all available Income Tax Forms with short descriptions. Choose the form(s) that are most relevant to your filing from the list available under all categories.
Q. 2 What are the different e-Verification options available for me?
Ans. The following e-Verification options are available. You may choose the one which is more convenient to you:
- Aadhaar OTP
- Bank Account EVC / Demat Account
- DSC
For certain forms, e-Verification can be done only using DSC.
Q. 3 Can I make changes in the form offline before uploading?
Ans. Yes, the form can be prepared offline and uploaded in the e-Filing portal using the utility available. The utility can be downloaded from the e-Filing portal.
Q.4 Can someone else upload the forms on my behalf?
Ans. Yes, in certain cases, the taxpayer can choose and authorize another person to upload forms on his or her behalf. More information on who can be represented can be found in the Authorize and Register as Representative user manual.
Upload Income Tax Forms – Manual
1. Overview
The Income Tax Forms (Upload) is a post login service available to all registered users of the e-Filing portal. With this service, registered users can:
- File all Income Tax Statutory Forms online or offline (the online mode is preferred)
- Verify the Income Tax Statutory Forms
2. Pre-requisites for availing this service
- Registered user of the e-Filing portal with valid user ID and password
The below prerequisites are required corresponding to the verification method chosen by the user:
| Verification Methods | Prerequisites |
| Aadhaar OTP | Valid Aadhar linked with active and valid PAN |
| EVC | Valid and active EVC (the EVC can also be generated as part of the process) |
| DSC | Valid digital Signature Certificate. (DSC) |
3. Step-by-Step Guide
3.1 IT Forms Upload (Online)
Step 1: Log in to the e-Filing portal using your User ID and password.

Step 2: Click e-File > Income Tax Forms > File Income Tax Forms.

Step 3: File Income Tax Forms page is displayed with all relevant categories of forms. Choose the required form to be uploaded.
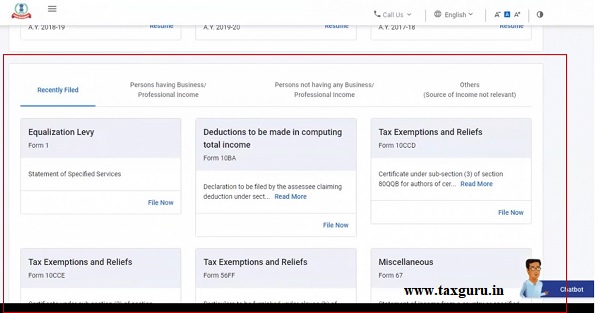
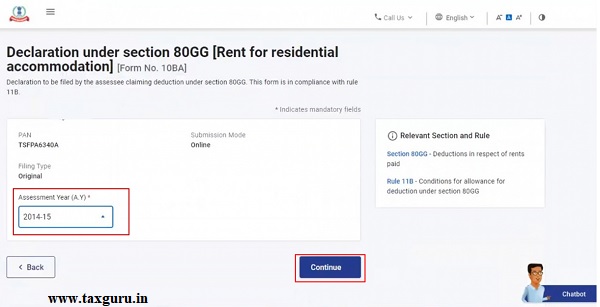
Step 4: The form is displayed after clicking on the relevant tile.

Step 5: Select or fill the details as required and click Continue.
Step 6: Click Let’s get Started.

Step 7: Once the details are filled, click Preview.

Step 8: If all the details are filled correctly, click Proceed to e-Verify. In case an error message is displayed, edit the form as required before submitting.

Step 9: You will be taken to the e-Verify page.
Note:
- Some forms can only be e-Verified using Digital Signature Certificate.
- Refer to the UM on How to e-Verify to learn more.
On successful e-Verification, success message is displayed along with a Transaction ID and Acknowledgement Receipt Number. Please keep a note of the Transaction ID and Acknowledgement Receipt Number for future reference.

3.2 IT Forms Upload (Offline)
Step 1: After choosing the Form to file, select Offline as the Submission Mode.

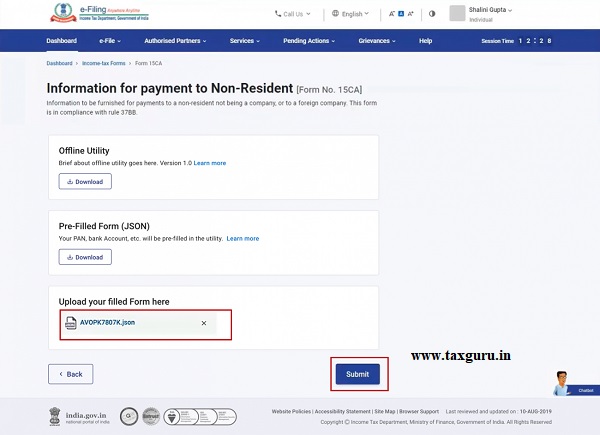
Step 2: Download the Offline Utility in your computer.

Step 3: Download Pre-filled Form (JSON). Forms for the respective PAN / TAN and specified period gets downloaded to your system in the JSON format. As it is the JSON format, the utility is required to be downloaded to make any changes to the JSON file.

Step 4: Upload the filled form in the utility.
Step 5: You will be taken to the e-Verify page.
Note:
- Some forms can only be e-Verified using Digital Signature Certificate.
- Refer to the UM on How to e-Verify to learn more.
On successful e-Verification, success message is displayed along with a Transaction ID and Acknowledgement Receipt Number. Please keep a note of the Transaction ID and Acknowledgement Receipt Number for future reference.


1. In the old portal, details could be filled in Excel sheet and could be saved for editing. Is there a similar provision in the new portal?